PASSAGE: HSTA Faculty Exhibition – June 30-July 30, 2010

There are times when a call for entry with a specific theme is put out and I draw a complete blank.  I go through all kinds of contortions trying to come up with some sort of inspiration, and then what I end up with looks equally tortured! So I was really excited when, upon finding out out last summer that the theme for this year’s HSTA Faculty Exhibition was going to be “Passage”, I immediately had an idea.

A former boss made the comment to me once that we are all dependent on the products of mining:  “If it can’t be grown, it has to be mined,” he said.  While this statement could almost be considered a universal truth, it is particularly true for jewelers.

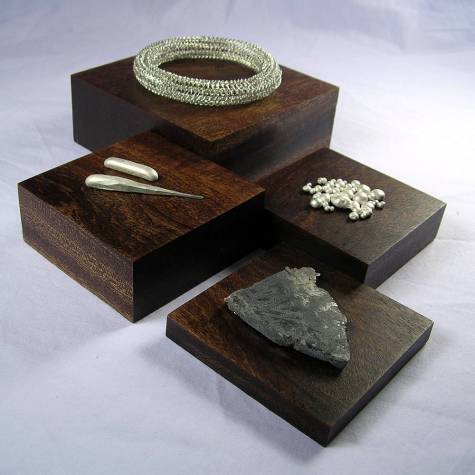
I wanted to show a piece through various stages of its development – the passage from ore to granule, from granule to ingot, from ingot to wire, from wire to jewelry.

Having attended a number of fine craft exhibitions during my time with The Metal Arts Guild of Canada, one thing that has always struck me is how jewellers have dealt with the issue of effectively displaying something so small.

The first MAG show I attended, Behind Glass (2000), directly challenged the problem by asking everyone to display their pieces in shadow boxes.  The pieces I remember were a silhouette of a person – a brooch in silver – attached to a picture of a beach, to give the illusion of it standing at the water’s edge.  Another entry was a ring topped by a tiny sewing machine displayed in front of a old photograph of the artist’s grandmother, who loved to sew.

At the most recent exhibition, MAGC 2067:  Crafting the Future, several of the artists included supplementary props with their pieces.  Anne Lumsden’s piece was displayed over a bed of zebra mussel shells.  Rosalyn Woo’s award winning brooch, “Dear Linda” was envisioned as a birthday gift for its fictitious namesake, and included the “letter” written by the “maker”, Jacob.  Some might argue that the props detracted from the work – turning them into sculpture rather than jewelry – but for me, it added visual interest and helped to put the pieces into the context of the scenarios they were made to represent.

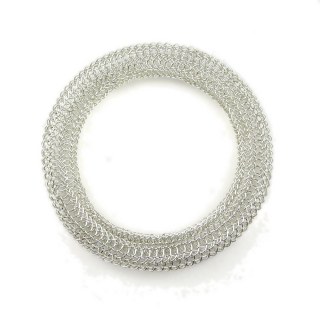
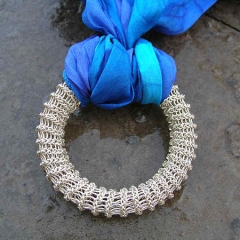
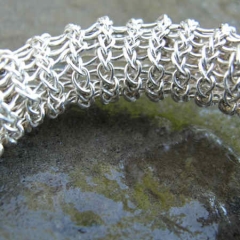
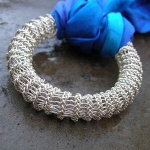
So, for this year’s HSTA Faculty Exhibition, I decided to approach my submission as jewelry cum sculpture.  The pinnacle of the Passage – and the piece that took the longest to construct – is the torus bangle.  Despite my ravings last year after a previous attempt at a torus, the thought of trying again appealed to me.

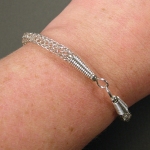
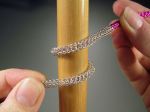
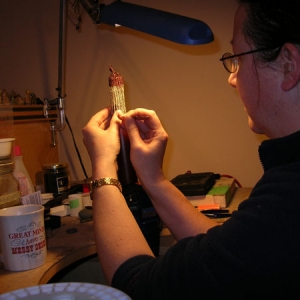
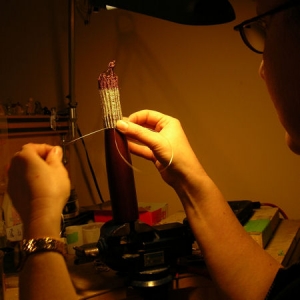
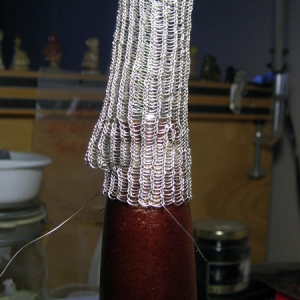
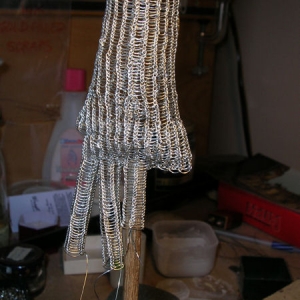
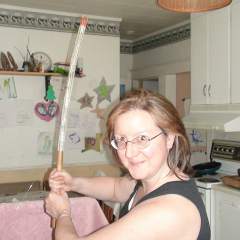
My six year old is currently obsessed with all things LEGO and Star Wars, so when I got the tube to the final length (18″/45 cm) I decided to have a little fun, and took a picture of myself in my best Jedi Princess Warrior pose.
.

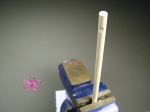
My wonderful handyman husband whipped up a wooden drawplate with large holes for me.  (He loves it when I give him an excuse to buy tools!)  After drawing, the length of the tube was over 40″ (101 cm). The reason I made it that long was to give me extra material in case I had to try again.

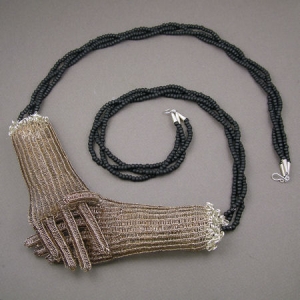
The technique for making a seamless join is called kitchener stitching.  It’s a common knitting technique for adding pockets to sweaters, or fingers to mittens, etc.  It’s tricky to do in wire, because the wire work hardens very quickly and the join tends to have a bit of a bulge.

I made two attempts at tori before finally working out an effective way of keeping the seam from being visible.

The casting grain and ingots gave me an opportunity to feed my own tool fetish:  I now have a new ingot mold! *grin*

The silver ore came from a vendor at the Bancroft Gemboree last year.  Unfortunately, no locality info was included with the specimen, so I don’t know if the source is a Canadian mine.

The mahogany display blocks play an integral role in delineating the passage through the stages.

I am grateful to be able to work with metal and to make wearable art, and so my submission to the HSTA Faculty Exhibition is really about paying homage.

.

Passage:  From Ore to Jewelry (2010)
Silver ore, slabbed
Grains, 18.43 g, sterling silver, cast
Ingot, sterling silver, cast, 6.844 g
Ingot, sterling silver, cast, forged, drawn, 7.992 g
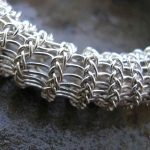
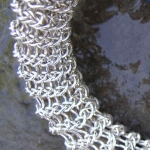
Torus, sterling silver, viking knit, kitchener stitching, 1.3 cm tube, 8.5 cm OD
Displays, mahogany wood, danish oil finish, various sizes

Every piece of jewelry is the end of a journey.  The metal forms as ore deep underground.  It is mined, extracted and formed into granules, then melted and cast into ingots.  The ingots are compressed and made into a usable shape.  In this case, it was drawn into wire, then knitted into a torus.

We see and admire only the final form, and acknowledge only the artist whose name is attached to it; yet the piece has been touched by many hands.  I wanted to recognize and thank those who labour behind the scenes to bring my jewelry into being.

.

PASSAGE: HSTA Faculty Exhibition
Rails End Gallery & Arts Centre
23 York Street
Haliburton, Ontario, K0M 1S0
June 30 – July 30, 2009
www. railsendgallery.com

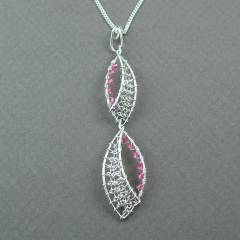
YOJ09-51 Marquise Series: Pendant 5

Marquise Series:  Pendant 5 (2009)
Sterling silver, fine silver, Swarovski crystal
Constructed, cold-joined, nalbinding
L 6.5 cm x W 1.3 cm

This pendant is made of two “recycled” pieces from Bracelet 3, which didn’t match the other links.  Initially I only added the Swarovskis as embellishment, but the pendant looked unbalanced.  So I decided to add some viking knitting – nalbinding – and create a ribbon-like effect.  The work involved in adding the nalbinding bumps this up from production piece to a “couture” One of a Kind or Limited Edition.
I’m not completely satisfied with how it turned out, but I’m also not able to define what is bothering me about it.   It might just be that it doesn’t work as a pendant.  The design would certainly make a fabulous pair of earrings.  Comments are welcome!

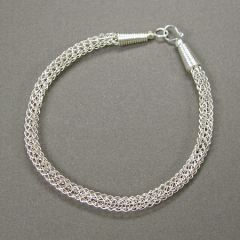
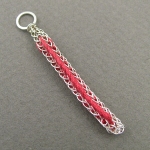
YOJ09-22 Viking Knit Bracelet

Viking Knit Bracelet (2009)
Fine silver, sterling silver
Nalbinding, cold connected
L 20.5 cm x W 0.4 cm

I’m hard at work on the tutorials for my class, so this week’s project is the product of that work.  I’ve been doing a lot of photography, and editing and layout.  I’ve been pretty much eating, sleeping and breathing the project.  The first tutorial is finished, and the second is well in hand.  Four to go… and six weeks until the classes start.

More photos:

YOJ09-21 Viking Knit Torus

Viking Knit Torus (2009)
Sterling silver
Nalbinding
L 55 mm x W 55 mm x D 10 mm

I’m insane.

People who know me are familiar with this quirk in my personality, but every now and again I feel compelled to demonstrate it.  Hence, this week I decided – despite numerous pressing deadlines – I absolutely had to attempt making a torus out of viking knitting.

Nalbinding was historically used for things like socks, mittens, bags, hats and the like.  In wire, it’s been used mostly for chainwork.  To the best of my knowledge, no one has tried using it for sculptural wirework, and certainly no one has tried using it to construct a torus.  Loren Damewood, who I’ve had the pleasure of meeting, has made a toroid bracelet out of string, with plans to attempt it in wire, but his technique is marlinspike knotting.

Thanks to my experience making the Merry Meet necklace, I decided to make the first attempt in polymer coated wire.  I have pounds of the stuff, and it’s great for experimenting.  Unfortunately though, it doesn’t lend itself to annealing, which meant I could only get as far as shaping the torus.  I couldn’t finish the seaming without risking wire breakage.

I’m contributing that first piece to The Metal Arts Guild of Canada’s call for Nuit Blanche 2009.

I’m completely obsessed with this idea, so decided that I would try one in silver.  At the Zilberschmuck “Connection” opening a couple of weeks ago, I was talking to Charles Funnell about viking knitting.  He had been trying to do some chainwork and was finding it challenging.  I commented that it would work better in fine silver than in sterling, because the metal is more maleable.  Unfortunately, the only fine silver wire I have on hand at the moment is 28 ga, and the idea of doing it in that fine a gauge really didn’t appeal to me.  So, I decided to try 24 ga sterling in dead soft.

Well…

It was easier to work than the polymer coated copper, but I still ended up with a blister on my pinky from pulling wire.  After a while, even wearing a bandage on the finger didn’t help.  Yes, I suffer for my art…

The main challenge of a torus is making it seamless. The rest is just like making tubing.  I figured out a way of making the stitches nice and tight, thanks to a tool that Loren uses for his turks head knot rings.  Three stitches before the finish, and despite frequent annealing, the wire broke on me!  :bang head:

Luckily the repair was easy, and I was able to finish it up.  I spent far too many hours on this, but I’m very pleased with it and want to make more as time and my finger permit.  The ghost of Frank Hoffmann is whispering in my ear again though:  for the amount of work involved, I should be making it in gold.

More photos:

“The Vik-Knit 3000”

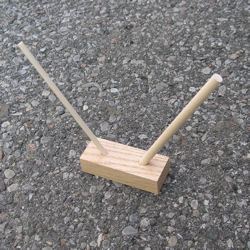
In preparation for my class at the Haliburton School of the Arts this summer, I asked my beloved husband to prepare some tools for the viking knitting segment.  My older son, Thumper, was very keen to help.

Thumper has recently become complete fascinated with machinery.  I’m not sure if this is a reaction to the movie “Wall-E”.  Anyways, he’s been drawing fantasy machines and coming up with all kinds of interesting names for them, most of which end in some denomination of 1000.  “This is a Cheese Grater 2000!”  “This is a Hopping Frog Truck 3000!”.

So, of course, he was very interested in what Daddy was constructing.  It’s just simple dowel holder, which gets clamped to a work surface.  Thumper decided it needed a name.  After asking what it was used for, and being told “viking knitting”, he said “Let’s call it the “Vik-Knit 3000!””

I keep trying to come up with a “Ginsu Knife” type infomercial to go with the name.  “The Vik-Knit 3000 will make your viking knitting a breeze!  Clamp it to the desk and you’re ready to go!  It will practically do the knitting for you!  But wait!  There’s more!  Order the Vik-Knit 3000 now and you’ll get two – count ’em – TWO! different sizes of dowels!”

LOL.  Anyways, it was just too cute not to share.

YOJ09-12 Viking Knit Chain (and “Merry Meet”)

Viking Knit Chain (2009)
Fine silver, sterling silver
Chain L 68.6 cm x W 0.35 cm
Pendant L 5.8 cm x W 2.5 cm
Nalbinding, constructed, cold-connected, flameworked, cast

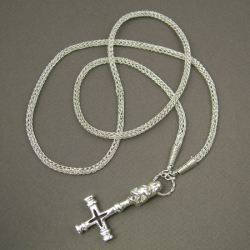
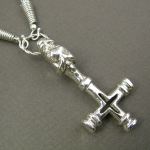
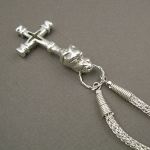
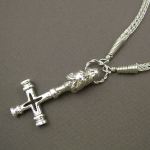
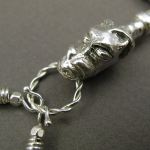
Several years ago, my husband and I collaborated on making a Thor’s Hammer.  Malcolm is fascinated by all things Norse, to the point where I’ve joked many times about him being a born-again Viking.  He carved the cross for this pendant, but struggled to model the head properly.  I came up with the idea of forming the head out of stick tack (aka white tack, blue tack etc etc), and then we cold molded the whole piece for casting.  That original was finished, and then remolded and four more pieces were cast.

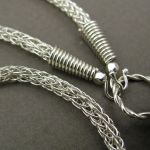
Malcolm made himself a lovely chain to go with the original.  Unfortunately, our studio gremlins made off with it some time during our move, so all he has now are the copies.  Wanting to wear his Thor’s Hammer, he recently asked me to make a chain for him.

So this week, on the heels of finishing my competition entry, I decided to whip it off.  My hands are not quite recovered from the massive project, so by the time I was half way through working on this chain, I was having to put a bandaid on my pinky.  I was developing a blister from all the pulling.

My beloved husband is very happy with his new chain, and thrilled to be wearing his pendant.

Some more photos:


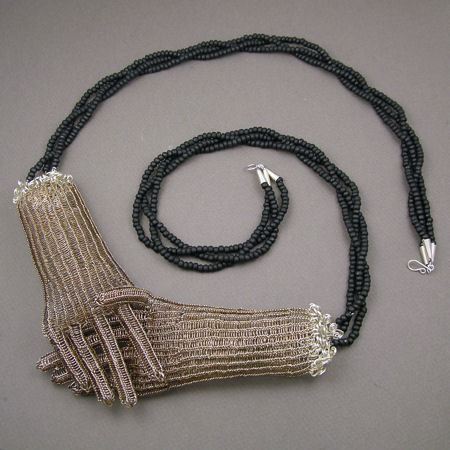
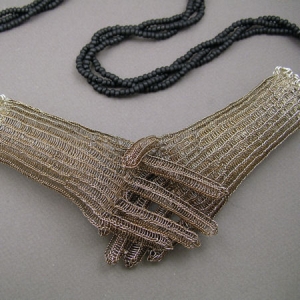
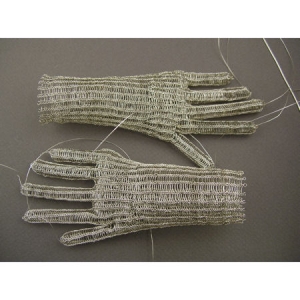
Also, as promised, I’m posting the photo of my competition entry to “Connection”, the National Juried Exhibition being held by Zilberschmuck Art Jewellery and hosted at Shao Design. The call for entry asked: “What is your interpretation of the word “CONNECTION”? Is there a connection part, link or bond? Is there an association or relationship between two or more things? Do associates, relations, acquaintances or friends influence the outcome of the piece? Is it a single connection or one of many types and kinds of connections that make up the piece? How can these ideas be formalized into a three-dimensional piece?”  My entry focused on the connection we make with each other, through a handshake. Clasping hands in greeting, in parting, in confirming business arrangements, in offering congratulations, is often the only physical connection we make with each other.

Merry Meet (2009)
Fine silver, sterling silver, glass
L 102 cm x W 7.0 cm
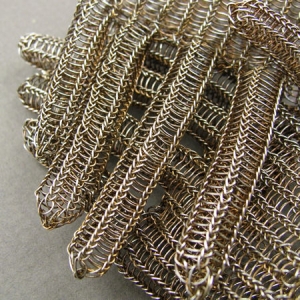
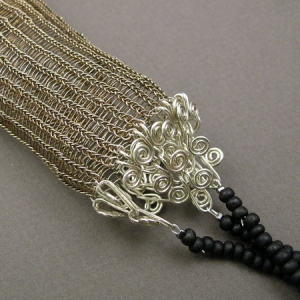
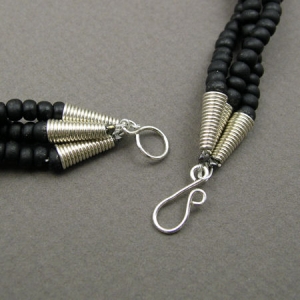
Nalbinding, constructed, cold-joined, liver of sulphur patination

My husband’s comment about this piece:  “It’s odd.”

Yes, but that’s  “art” jewellery for you… LOL

The hands clasp together just over the solar plexus.  If I thought anyone would wear it that way, I would have liked to turn it into a stomacher – I think it would be well suited for that – but it works as a necklace as well.

From start to finish, it took two months of solid work to construct, and is (pardon the pun) hands down, one of the most ambitious pieces I’ve ever attempted.  It’s not exactly what I envisioned – that would have taken another three months of work to complete.

As I mentioned last week, it didn’t make the final cut for the exhibition, but I’m not disappointed about that.  I am satisfied that I got it done in time for judging.

Here are more detail photos, along with shots taken during construction:

YOJ09-10 Fun with Fibre

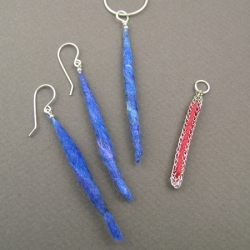
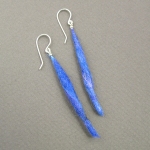
Fun with Fibre Earrings 1 (2009)

Sterling silver, wool
L 6.7 cm x W 0.5 cm
Formed, wet-felted

Fun with Fibre Pendant 1 (2009)

Sterling silver, wool
L 6.5 cm x W 0.4 cm
Formed, wet-felted

Fun with Fibre Pendant 2 (2009)

Sterling silver, fine silver, cotton thread
L 4.5 cm x W 0.45 cm
Nalbinding (viking knitting), embroidered

This has been a frustrating week, in terms of getting anything done.  Number 2 Son has been demanding a lot of attention.  “I want to do homework!  I want another printing sheet!” every 10 freaking minutes.  Normally, a parent loves to hear that their child wants to do homework, but in my case, it meant getting up from bench, sitting down at the computer, waiting for him to make up his mind about what he wanted to work on – an achingly slow process – and then printing it off.  As a result, I was never able to focus on finishing the project whose deadline came and went on Friday.

He starts JK in the fall, and then I will have more extended blocks of time to work without interruption.  I’m trying to enjoy these last couple of months of us being together before he becomes a Big School Boy, but geez it’s annoying to miss a deadline.

I haven’t given up on trying to finish the project, which is very labour intensive, but by last night, I decided that I needed to change gears.  “Ferris Bueller’s Day Off” was on tv, so I set up my felting stuff on the floor, and played while watching the movie.  I’m still working on learning felting, still hoping to apply it to bonsai.  One of the websites I stumbled across applied roving to craft wire, so I thought I’d give that a go.

My results are nothing spectacular, but then they weren’t intended to be.

The other thing I wanted to try was mixing fibre and nalbinding.  I actually wanted to mix nalbinding with wire embroidery, but figured it would be too high on the PITA factor.  I ended up using embroidery thread, but the idea still has a high PITA factor.  My embroidering skills leave much to be desired as well *grin*.   I may try the idea again, but approach it differently.

More photos:

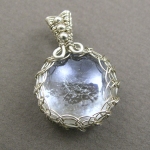
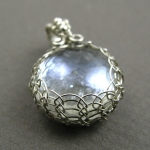
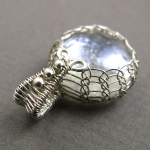
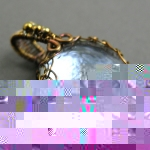
YOJ09-06 Viking Knit Pendant

Viking Knit Pendant (2009)
Sterling silver, fine silver, glass
Constructed, liver of sulphur patination
L 2.9 cm x W 1.9 cm

I’ve got Viking knitting on the brain this week, because I’m working on a competition piece that uses that technique.  It’s a slow, tedious process, but at the same time, strangely rhythmic and meditative.  So far on the competition piece I’ve used about 15 ft of wire, and have oh… 1 1/2″ (just under 4 cm) of knitting completed.

Needless to say, it’s not the piece I’m posting for this week.

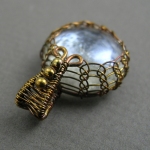
Since I have my fingers suitably warmed up, I figured I’d try using the technique on a pendant, and add a woven bail.  This result is slightly different than the netted pendant I made for myself about a year ago.

I also decided to add liver of sulphur patina to it because silver and clear glass is just plain boring.  The thing I love about LOS is the range of colours that can be produced, from straw yellow to deep dark black.  My LOS is very old – so old in fact that it doesn’t dissolve properly anymore.  I mixed up a weak solution and swirled the pendant around in it.  Initially it went gold/brass coloured, but I decided I wanted to go deeper, so I popped it back in.  I like the coppery brown colour I have now.

More photos, both with and without LOS: