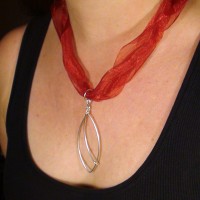
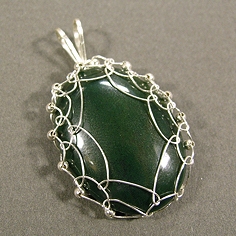
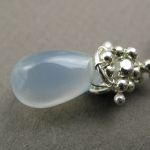
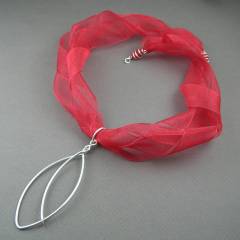
YOJ09-52 Marquise Series: Pendant 6

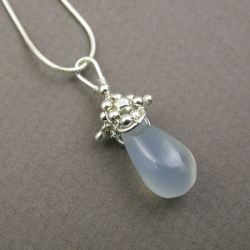
Marquise Series:  Pendant 6 (2009)
Sterling silver, ribbon
Constructed, cold-joined
L 9.8 cm x W 3.4 cm/Ribbon: L 52 cm x W 3.0 cm

.
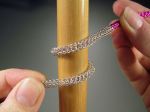
My ex-husband used to say “Go Big or Stay Home”, so I’m finishing off the Year of Jewelry 2009 with a super-sized version of the Marquise Pendant.  This started off as an experiment to see if the basic marquise shape would translate to a bangle, but I haven’t worked out the kinks to that yet.

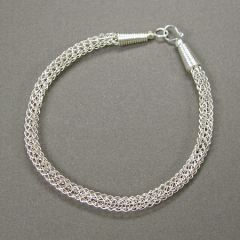
I also decided to give the ribbon necklace another try, although again, it’s technically uneconomic to make.  Ah well, I wanted to finish up the year in style!  LOL

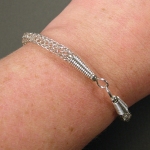
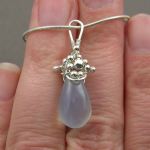
Here’s another shot of what it looks like on:

And so this very challenging year comes to an end.  I’ll have a look back over the year and post some thoughts about what I achieved.

Until then, I wish you and those close to you a very Happy New Year, filled with enough challenge to keep you interested, and enough joy to keep you inspired!

All the best in 2010!

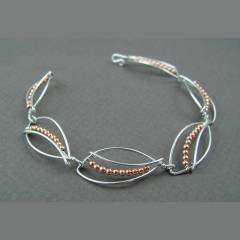
YOJ09-50 Marquise Series: Bracelet 3

Marquise Series: Bracelet 3 (2009)
Sterling silver, copper, fine silver
Constructed, cold-joined
L 16.8 cm x W 1.1 cm

For this piece, I took the idea developed in Week 48 and extended it to a bracelet.  The design looks simple, yet it surprised me how much work was involved in adding the copper beads.

I like the bi-metal toning – it’s a nice effect, and would really sparkle on tanned, warm toned or dark skin.

Like the project in Week 45, I alternated the links in mirror image; however, the alternating pattern sets up an issue for sizing.  I noticed it with the Week 45 bracelet as well, but because it’s all one metal it’s not as obvious.   With this bracelet, because there are two metals, it becomes clear that there can’t be an odd number of links: it throws off the pattern.  This design will fit either a very small wrist (like this bracelet does), or a very large wrist.  On my wrist, which is a little thinner than standard, but not small, the bracelet fits comfortably with room to move easily, but I generally like to wear my bracelets loose so that they jingle.

The design would look stunning with the Swarovskis I used in Week 48, but adding them will also add to the price of the finished piece.  If you’re interested in a Swarovski version, please email me for a quote.

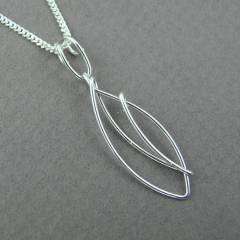
YOJ09-49 Marquise Series: Pendant 4

Marquise Series:  Pendant 4 (2009)
Sterling silver
Constructed, cold-joined
L 3.6 cm x W 1.6 cm

Here is one more variation in sterling silver.  The original idea was to add a 2 mm Swarovski crystal, similar to what I did in the Week 47 project, but I ended up deciding against it.

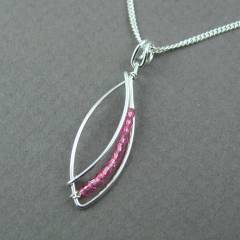
YOJ09-48 Marquise Series: Pendant 3

Marquise Pendant:  Pendant 3 (2009)
Sterling silver, fine silver, Swarovski crystal
Constructed, cold-joined
L3.5 cm x W 1.6 cm

Lots of playing going on!  I love the sparkle of Swarovskis, so I added a thin row of crystals to this next pendant in the series.  I love the classic “sweetheart” look that resulted!

YOJ09-26 Prong Set Pendant

Prong Set Pendant (2009)
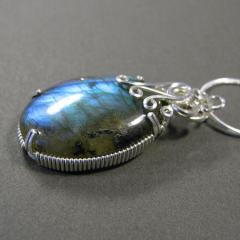
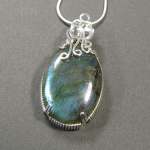
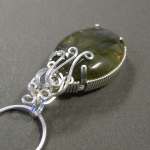
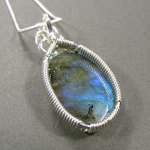
Sterling silver, labradorite
Constructed, cold joined
Private Collection

I found this labradorite in my stash again recently while working on the prong set pendant tutorial.

I’m rediscovering my love of stones, and am fantasizing about going to Bancroft to *shop*!  Having put myself on a buying moratorium for the last few years, I normally go to the gemboree just to have a look around.

When I floated the idea of going this year, my DH surprised me by suggesting I go by myself!  It’s a long drive to take the boys on, and since they don’t show much interest in rocks (other than the ones they can throw into water), the show is wasted on them.

Hmmm…. the possibilities…

More photos:

YOJ09-25 Netted Pendant

Netted Pendant (2009)
Fine silver, sterling silver
L 6.0 cm x W 2.5 cm

I’m running a bit behind with my YOJ postings, but I have been keeping up with doing the pieces.  My focus has been on preparing for my class, which starts 9 days from today!  This netted pendant is one of the projects for the class.

The good news is that I will get all of the tutorials done.  The bad news is that I have no idea if my wire is going to arrive in time!

Getting the supplies for these classes has really tested my patience. Back when I worked in the mining industry, the gentleman I worked for always reminded me to prepare for Murphy’s Law.  I’ve been reminded of that over and over in the last few weeks…

I do my best to support Canadian companies, partly because I believe in buying locally, but also because that way I don’t have to deal with the extra hassle of shipping, customs, duties and fluctuating exchange rates.

But some suppliers really make it a pain in the ass to deal with them.

Case in point:  John Bead, a trade-only wholesaler and beader’s heaven.  They would be an ideal Canadian supplier if they actually had the things I needed IN STOCK!!!  Three weeks ago I went to JB – my first visit in years – and I was reminded why I don’t bother to shop there unless I absolutely have to.  The warehouse is a frustrating jumble of aisles and bins.  Just finding things is the first challenge.  Then the flat nose pliers I wanted were out of stock.  I had to settle for a cheaper, lighter weight version.  The round nose pliers – every style – were out of stock.  The only pliers they did have in stock were their own house brand – at $20 a pop.  They didn’t have enough spools of 26 gauge copper wire, so I had to buy half of them in brass.  No 1.5 mm antique copper chain in stock.  Barely any 2 mm copper beads in stock.  This is a wholesaler, remember, with several thousand sq. feet of showroom space…

*If* they had had the pliers, I would have been well over their minimum purchase requirement.  As it was, I ended up having to visit their Swarovski room and buy a bunch of Swarovski crystals I didn’t really want or need to make up the difference.  And even there, the stock on some of the common colours was patheticly low!

So, if you’re in Canada, looking for wholesale Miyuki, Swarovski or Preciosa, John Bead is a go-to supplier if you can meet their minimum.  As for me, I think next year I’ll deal with the shipping costs, and customs charges, and just order from Rio Grande…

And increase the cost of the kit…I’m dealing with a very tight budget here, so that makes sourcing reasonably priced supplies problematic.

Thankfully, I found another supplier for the round nose pliers – Habsons Jeweller Supplies in Vancouver.  They had the quantity I needed in stock, and they had them packed and shipped the day after I ordered them.  This is the second time they’ve come through for me on a hard-to-find item.  Last year I bought a half dozen wooden ring mandrels from them – impossible to find elsewhere in Canada, but they had them.  I love these guys.  Great customer service.  Actually, maybe I’ll order from them first next year…

Next was the still-ongoing misadventure with the copper wire.

There are NO suppliers of shaped copper wire in Canada.  So, ordering from the US is required.

I placed my order in mid-June, with expected delivery in 10 business days.  The time came and went, and when I followed up this last week, I found out the supplier missed something on the paperwork.  The package had been returned and had sat in their warehouse for a week before being sent out again.  So now I’m sitting here hoping the package will arrive in the next few days.  If it’s not here by Tuesday, I have to re-order the whole lot (US$900+), and have it sent up here by express overnight courier.  Cost of the courier:  US$102.  *gloom*  And I have to re-source the cabochons because I cleaned them out of their 22×30 mm with my last order.   And then I’ll have two complete sets of the wire I need for the classes once the other order finally does arrive.  The owner is doing her best to be helpful, even taking time out of her vacation to deal with this for me.

In the meantime, I’m beavering away, working on tutorials, putting together what I can of the kits, and trying not to stress out…

YOJ09-22 Viking Knit Bracelet

Viking Knit Bracelet (2009)
Fine silver, sterling silver
Nalbinding, cold connected
L 20.5 cm x W 0.4 cm

I’m hard at work on the tutorials for my class, so this week’s project is the product of that work.  I’ve been doing a lot of photography, and editing and layout.  I’ve been pretty much eating, sleeping and breathing the project.  The first tutorial is finished, and the second is well in hand.  Four to go… and six weeks until the classes start.

More photos:

YOJ09-17 Chalcedony Effervescence Pendant

Chalcedony Effervescence Pendant (2009)
Sterling silver, fine silver, chalcedony
L 3.0 cm x W 1.2 cm
Cold connected, flame worked

I went to the Toronto Gem Show today – and I was by myself!!  Woo hoo!  That meant I had the freedom to be able to browse, and chat with friends, and to shop.  I was looking for some things for my upcoming classes at Haliburton, but in the end decided that what I’ve found online is still a better bargain.  But… I couldn’t resist a strand of chalcedony brios I came across.  In a table full of stuff that looked like it was dyed, I found one package that had a beautiful opalescent glow.  So, despite being on a buying moratorium for the past three years, I decided those beads had to come home with me.  Even the sales lady commented about the package, saying that if I hadn’t bought it when I did, it wouldn’t have been around later – someone would have snapped it up.

Tonight I picked out one of the beads, and made this little pendant.  It looks somewhat similar to the pendant I made in Week 8, so I’ve giving it a similar name.

More photos:

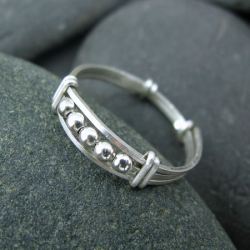
YOJ09-16 Beaded Channel Ring

Beaded Channel Ring (2009)
Sterling silver, constructed, cold worked
Size 5 1/2

My lack of energy is starting to concern me.  If this keeps up I’m going to haul my carcass off to the doctor and find out what’s going on.

For now, another simple offering this week – a beaded channel ring.  The tutorial for this ring was published in “Contemporary Bead & Wire Jewelry” by Nathalie Mornu and Suzanne Tourtillot, one of two projects I contributed to the book.

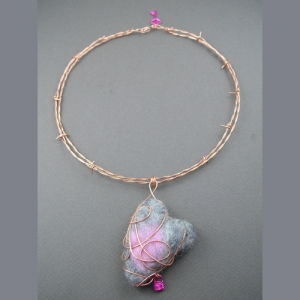
YOJ09-05 The Caged Heart Grows Cold

The Caged Heart Grows Cold or Portrait of the Artist circa 1998 (2009)
Bare copper, polymer coated copper, wool
Constructed, needle-felted
Pendant:  L 7.5 cm x W 4.2 cm; Neckwire:  L 45 cm

I’ve been debating with myself for three weeks about what and how much to write about this week’s entry.  I made the felted heart in week 2, but then discovered that studio gremlins had made off with my copper wire…  I finally found a small spool of it last week, so was able to start work on the project.  The gremlins are refusing to let go of the rest, though, so this is the last copper piece I’m going to be making for the time being.

I spent a lot of time during my hiatus meditating on the direction I should go with my jewellery.  Time and time again I’ve gotten the message that my jewellery needs to connect with the spirit, and express more of my inner voice.

So, my piece this week speaks from a very personal perspective.  The very long story behind it is one that only my very closest friends have known about before now.

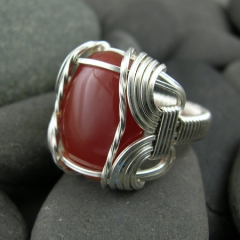
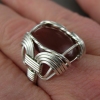
YOJ09-02 Standard Form Ring

Standard Form Ring (2009)
Sterling silver, carnelian
Size 10

I wasn’t intending to post this as my second entry for the YOJ, but it’s now Sunday, the due date for this week, and the piece I actually wanted to post isn’t finished.  I’m “tweaking”.  It feels very much like I’m doing a science experiment.

So… in the meantime…

I’m going to be teaching at Haliburton again this summer, and I have a bunch of tutorials I need to write in preparation for the class.  Last fall I proposed a second level wire jewelry course, which was accepted.  One of the projects is going to be the Standard Form Ring, aka Pharaoh’s Ring.  (Why it’s called the “Pharaoh’s Ring” is a mystery:  I haven’t been able to find any historical examples using wire.  References to cast versions, yes, wire, no…).  It’s called the “Standard Form Ring” because it’s one of the all-time classic wireworking ring patterns.  A version of this ring was published in Moods in Wire by Ellsworth Sinclair, Beginning Wirecraft by Jessie Donnan, and in the Wire Artist Jeweller Magazine (June 2003).  It’s a substantial ring, usually worn by men.  I started writing my version this week, in between printing off “printing sheets” for Number 2 Son, who likes to do “homework”.

(Edit Jun. 25/09:  Thanks to some excellent detective work by Helen Goga, a historical reference for the Standard Form Ring has been found!  Mr. Thomas Vincent Phelan received a patent for the ring design (US Des. 150,726) in August 1948.  The patent lasted for 14 years, and the design went into the public domain in 1962.)

My own personal artistic proclivities don’t lean towards classical wirework, so I haven’t made this type of ring before.  I followed the WAJ instructions for my first two attempts.  I often tell my students that they shouldn’t worry about what their first attempt looks like:  usually with the first one, you’re just trying to get your head around the steps, so clumsiness is part of the process.  It’s no different for me.  This ring was attempt number 3… and I’ll likely make at least two more in the process of refining, writing and photographing the steps for the instructions.

There are useful wireworking skills to be learned from doing this project.  There are definitely some “tricks” to getting it to look nice.  Notes are being scribbled…

Some other views:

Haliburton Class – July 21-25, 2008

JUST CONFIRMED!

I will be teaching the Wire Jewellery Course at the Haliburton School of the Arts, July 21-25, 2008. Here’s the course description from the Fleming College website:

Wire Jewellery

July 21, 2008

Course Number: ARTS0676

Section Number: 41

Please note: This course requires extensive use of hand tools (wire cutters, pliers) and a healthy level of manual dexterity. Start with the basics and learn to create and design your own jewellery using wire. Go from traditional wire wrapping techniques to original, free-form methods, or something in between. Emphasis will be based on creating pieces that reflect your individuality and personal tastes. No soldering is required and you will have the opportunity to incorporate beads, stones, and found objects to make your own unique designs. Basic hand tools and the use of some interesting tricks will enable you to continue upon completion of the course. Personal style and creativity will be encouraged in a relaxed atmosphere.

Please Note: There will be a $65 material fee payable to the instructor.

  • Welcome & Material List
Cost: $252.70
Hours: 47.50
Location: HALIBURTON
Starts: July 21, 2008
Duration: 47.50 hours
Day/Time: Monday, Tuesday, Wednesday, Thursday, Friday (09:00AM – 04:30PM)
Click for further information about Haliburton School of the Arts and to find out how to register.