Tutorial – Sweetheart Ring

Sweetheart Ring - Tutorial Instant Download from wrapturetutorials.com

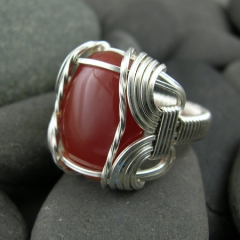
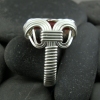
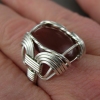
Sweetheart Ring
Level of Difficulty:  Intermediate

This little ring is very economical in its use of wire, but what a pretty result! Its look is perfect for delicate fingers, but the pattern can be easily adjusted for larger ring sizes and stones. For those who have mastered the basics and are looking to move on a new skill level, this project introduces some precise measuring and calculation.

13 pages, 45 photos, 40 steps, plus design notes

USD $15.00

Tools & Materials You’ll Need:

Tools:
Flat Nose Pliers
Round Nose Pliers
Chain Nose Pliers
Flush Cutting Wire Nippers
Vernier Caliper
Permanent Marker
Measuring Tape/Ruler
Jeweller’s File
Rouge Cloth
Wooden Ring Mandrel
1/4″ (6 mm) Masking Tape

Materials:
16″ (41 cm) 22 ga. (.65 mm) Soft Square wire
1 1/2″ (4 cm) 22 ga. (.75 x .5 mm) Half-hard half round wire
1x 6 mm facetted Cubic Zirconium or other stone

Substitutions:
Substitutions are not recommended for this project.

Available now from my Tutorials Page and in my Artfire Shop.

Tutorial – Ancient Whispers Earrings (Free)

Tutorial - Ancient Whispers Earrings

Ancient Whispers Earrings (Free download)
8 pages, 43 photos, 43 steps
Level of Difficulty:  Easy

What do these earrings remind you of?  A lady of Ancient Rome strolling in her garden, admiring the mosaics and calla lilies?  The Ionic Columns of Ancient Greece soaring above the Acropolis? Whatever springs to mind, the classics are never out of style!

It’s been quite a while since I released a free tutorial! While I put the finishing touches on my upcoming (and first!) Intermediate tutorial, I decided I’d make available this pair of earrings, which were originally featured in Week 13 the Year of Jewelry 2010.

This project was developed for a workshop I’ll be teaching this week and next at Harbourfront Community Centre in Toronto.

Tools & Materials You’ll Need:

Tools:
Flat Nose Pliers
Round Nose Pliers
Flush Cutting Wire Nippers
Permanent Marker
Measuring Tape/Ruler
Jeweler’s File
Rouge Cloth
Materials:
33 inches (75 cm) 20 gauge (.80 mm) Hard Round Wire  

Substitutions:
Half hard wire can be used for this project.

https://wrapturewirejewellery.on.ca/blog/2010/03/yoj10-13-ancient-whispers-earrings/

Click here to download!

Other tutorials (fee and free) are available on my Tutorials page.

Tutorial – Clip-on Earrings

For people who don’t have pierced ears, finding handmade earrings they can wear is a real challenge.  Back when I did shows, I’d occasionally get requests for clip-on findings, and lost sales because I didn’t have them.  Commercial findings were not an option for the types of shows I was doing.

So when, about a year ago, someone posted a message to one of the forums I’m on asking if there was a pattern for clip-ons, I thought “What a great idea!”.  I got out an old pair of my mom’s clip-ons and studied them to figure out a way to make a pair in wire.   And today I’m very pleased to announce the release of a new tutorial – Clip-on Earrings!

Clip-OnEarrings-Main

The Clip-on Earrings tutorial includes two variations:  Variation 1 makes a basic spiral, with a loop for adding a dangle.  Variation 2 forms a base on which you can add your own embellishment, so if you have a favourite bead, or button, you can add it.  Variation 2 also has a loop for adding a dangle.

13 pages, 45 photos and 40 steps
USD $8.00

Level of Difficulty:  Easy

Tools and Materials You’ll need:

Tools:
3-Step Pliers
Flat Nose Pliers
Round Nose Pliers
Flush Cutting Wire Nippers
Permanent Marker
Measuring Tape/Ruler
Jeweller’s File
Rouge Cloth
10 mm Dowel/Knitting Needle (for Variation 2)

Materials:
15″ (38 cm) 20 ga. Hard Round Sterling Silver wire

Substitutions:
20 ga Half Hard Silver wire can be substituted.

Available from my tutorials page and my Etsy Shop.

Tutorial – Art Nouveau Bangle

I’m pleased to announce that my newest tutorial, Art Nouveau Bangle, is now available!

This bangle features lovely flowing curves and Celtic elements that were common in the Art Nouveau period.

The project was a big hit with my students at the Haliburton School of the Arts! Once you have the basic technique down, you can easily adapt the design and let your creativity flow to create your own variations!

16 pages, 103 photos, 110 steps, plus design notes
USD $15.00

Level of Difficulty: Advanced

Tools and Materials you’ll need:

Tools:
Flat Nose Pliers
Round Nose Pliers
Flush Cutting Wire Nippers
Permanent Marker
Measuring Tape/Ruler
Bracelet Mandrel
Penknife
1/4″ dia. Masking Tape
Rouge Cloth

Materials:
96″ (240 cm) 20 ga Soft Square Silver wire
69″ (175 cm) 22 ga Half Round Silver wire
22 x 30 mm cabochon

Substitutions:
22 ga Soft Square Silver wire can be substituted for the 20 ga. wire.

Available from my tutorials page and my Etsy Shop.

“The Vik-Knit 3000”

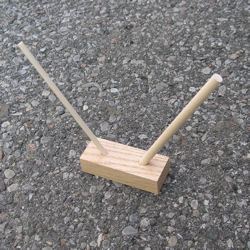
In preparation for my class at the Haliburton School of the Arts this summer, I asked my beloved husband to prepare some tools for the viking knitting segment.  My older son, Thumper, was very keen to help.

Thumper has recently become complete fascinated with machinery.  I’m not sure if this is a reaction to the movie “Wall-E”.  Anyways, he’s been drawing fantasy machines and coming up with all kinds of interesting names for them, most of which end in some denomination of 1000.  “This is a Cheese Grater 2000!”  “This is a Hopping Frog Truck 3000!”.

So, of course, he was very interested in what Daddy was constructing.  It’s just simple dowel holder, which gets clamped to a work surface.  Thumper decided it needed a name.  After asking what it was used for, and being told “viking knitting”, he said “Let’s call it the “Vik-Knit 3000!””

I keep trying to come up with a “Ginsu Knife” type infomercial to go with the name.  “The Vik-Knit 3000 will make your viking knitting a breeze!  Clamp it to the desk and you’re ready to go!  It will practically do the knitting for you!  But wait!  There’s more!  Order the Vik-Knit 3000 now and you’ll get two – count ’em – TWO! different sizes of dowels!”

LOL.  Anyways, it was just too cute not to share.

YOJ09-02 Standard Form Ring

Standard Form Ring (2009)
Sterling silver, carnelian
Size 10

I wasn’t intending to post this as my second entry for the YOJ, but it’s now Sunday, the due date for this week, and the piece I actually wanted to post isn’t finished.  I’m “tweaking”.  It feels very much like I’m doing a science experiment.

So… in the meantime…

I’m going to be teaching at Haliburton again this summer, and I have a bunch of tutorials I need to write in preparation for the class.  Last fall I proposed a second level wire jewelry course, which was accepted.  One of the projects is going to be the Standard Form Ring, aka Pharaoh’s Ring.  (Why it’s called the “Pharaoh’s Ring” is a mystery:  I haven’t been able to find any historical examples using wire.  References to cast versions, yes, wire, no…).  It’s called the “Standard Form Ring” because it’s one of the all-time classic wireworking ring patterns.  A version of this ring was published in Moods in Wire by Ellsworth Sinclair, Beginning Wirecraft by Jessie Donnan, and in the Wire Artist Jeweller Magazine (June 2003).  It’s a substantial ring, usually worn by men.  I started writing my version this week, in between printing off “printing sheets” for Number 2 Son, who likes to do “homework”.

(Edit Jun. 25/09:  Thanks to some excellent detective work by Helen Goga, a historical reference for the Standard Form Ring has been found!  Mr. Thomas Vincent Phelan received a patent for the ring design (US Des. 150,726) in August 1948.  The patent lasted for 14 years, and the design went into the public domain in 1962.)

My own personal artistic proclivities don’t lean towards classical wirework, so I haven’t made this type of ring before.  I followed the WAJ instructions for my first two attempts.  I often tell my students that they shouldn’t worry about what their first attempt looks like:  usually with the first one, you’re just trying to get your head around the steps, so clumsiness is part of the process.  It’s no different for me.  This ring was attempt number 3… and I’ll likely make at least two more in the process of refining, writing and photographing the steps for the instructions.

There are useful wireworking skills to be learned from doing this project.  There are definitely some “tricks” to getting it to look nice.  Notes are being scribbled…

Some other views:

Tutorial – Double Celtic Cross & Scrolls Earrings

.

.

.

.

.

.

.

.

.

At long last, a new tutorial!

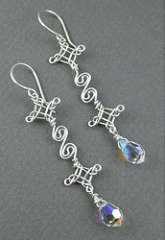
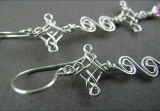
Double Celtic Cross & Scrolls Earrings

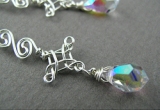
I created this design back in 1998, and it’s always been very near and dear to my heart!  For those of you who love all things Celtic, these earrings combine a couple of classic Celtic elements:  crosses and scrolls!

14 pages, 63 photos, 45 steps, plus design notes

USD $10.00

Available now from my Tutorials Page.

Tutorial – QEW Earrings

QEW EarringsQEW Earrings

Inspiration comes from the strangest places! This modern-looking pair of earrings was inspired by an Art Deco-era light standard I spied while driving along the Queen Elizabeth Way, in Toronto – and hence the name, QEW! I can’t remember exactly where it was – somewhere between High Park and the Humber Hump – only a quick glimpse, but it was enough!

9 pages, 26 photos, 22 steps, plus design notes

FREE

Available now from my Tutorials Page.

(Let me know what you think of the new tutorials format.)

Happy New Year!

Tutorial – Undercurrents Earrings

Undercurrents EarringsUndercurrents Earrings

The surface of the ocean shows only the smallest hint of the turbulence underneath the waves! This is a great project for practicing precise measuring and mirror images.

11 pages, 35 photos, 39 steps, plus design notes

USD $5.00

This tutorial was voted “Best Advanced Tutorial” &”Favourite Piece” by the Members of the International Guild of Wire Jewelry Artists, Earring Tutorials Contest 2007. IGWJA decided to put it into the advanced category for the purposes of the contest, but in my opinion, this is an easy project.

(FREE to IGWAJ members, login to the guild’s website to access the tutorials library. Note: IGWAJ version does not include all of the design notes)

Available now from my Tutorials Page.

Tutorial – Micki Ring

Micki RingMicki Ring

This bold, geometric design was inspired by the work of Max Froehlich (1908-1997), a Swiss-born goldsmith who was part of the “Modern” school of jewellery design. With one change, it is possible to make two variations of this ring! In heavier gauges, it makes an appealing men’s ring! The ring is named after Micki Bleily of Parma, ID, for whom it was made as a Secret Santa gift in 2002.

Project instructions contain both variations – 11 pages, 52 photos, 43 steps, plus design notes

USD $5.00

Available now from my Tutorials Page.

Tutorial – Illusion Prong Ring

Illusion Prong RingIllusion Prong Ring
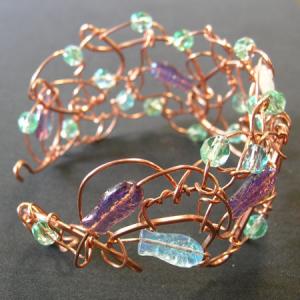
This quick and simple ring creates an illusion prong setting for a 6 mm bead. A modified version of this project was published in “Contemporary Bead and Wire Jewelry” by Suzanne Tourtillott and Nathalie Mornu.

5 pages, 16 photos, 14 steps, plus design notes

USD $5.00

Available now from my Tutorials Page.