Breathe

[galleryview id=31]

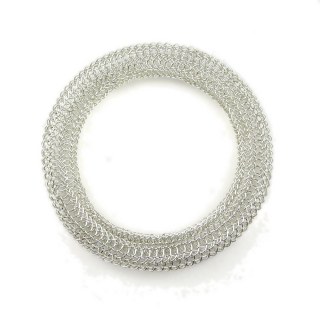
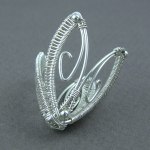
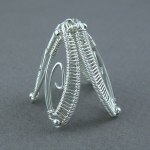
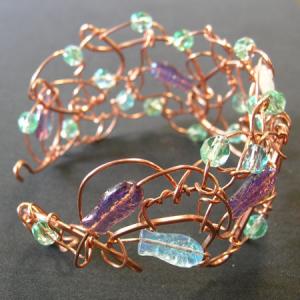
Breathe Scent Box (2011)
Copper, fine silver, sterling silver
Constructed, coiled, woven, cold-joined
H: 2.0 cm x W: 2.6 cm x D: 2.96 cm

Alright… I’m back… sort of…

I got hit with a perfect storm of personal and professional chaos in May, and my weekly postings to YOJ were the casualty. *sigh*

This piece, created for the upcoming HSTA Faculty Exhibition, is the only wire my hands have touched in the last month. It’s one of those pieces that has had to lend itself to being picked up and put down frequently while I deal with other pressures.

This year’s theme is “Breathe”. Years ago, during a conversation with a friend about being overworked and looking forward to a time when we’d be able to come up for air, I deadpanned “Breathing is overrated,” and then quipped about how that would make a really good epitaph for my headstone. The comment laid us both completely flat with laughter.

She reminded me of the conversation a couple of weeks ago when we were talking about all the “stuff” going on in our lives. This time she made the observation that it just seems to be part of my nature to throw myself into lots of projects at the same time. It’s true. I thrive on deadlines. However I’ve noticed a change in the last year or so in how I’m reacting: I seem to have developed insomnia. I regularly wake up after only a few hours of sleep, unable to shut off my brain, which spins with thoughts of all the things I need to get done.

I’ve come to realize that I do, in fact, need to breathe and relax.

This insight was reinforced as I was transcribing an interview I did with Dee Fontans, who teaches in the Jewellery Metals Program at Alberta College of Art & Design. We talked about the need to find balance between work and play, about re-energizing and feeding the muse. It’s something she struggles with as much as anyone else. [1. My interview with Dee Fontans will appear in the 2011: Two “College Review” issue of MAGazine, which is scheduled for release later this month. The audio of the interview will be available online after the issue comes out.]

So, I’ve recently started making a more conscientious effort to slow down, go for bike rides, and take notice of Spring. And breathe.

With the lilac and lavender in my front yard coming into bloom, giving off a wonderful perfume, my thoughts focused on how to carry that scent with me. I continue to be obsessed with containers, so I decided I would make a little box for holding a sachet of herbs or perfumed salts. Lavender, in particular, is supposed to be good for helping with relaxation and sleep.

One thing I wanted to experiment with was patterning. Years ago when I visited the Acoma Pueblo in New Mexico, I was really impressed with the patterns the inhabitants carved and painted onto their pottery. Likewise, I was struck by the patterning on the First Nations baskets I saw in BC. I was able to incorporate a triangular pattern on the rim of the bottom half through a structural change in the coiling of the basket. Because I knew it was going to spin while being worn, I also added decorative elements on the base and top. So there’s lots going on.

Of course, now that this piece is done, I have ideas for a half dozen other pieces, but those will have to wait.

I still have to catch my breath.

.
.
The Haliburton School of The Arts Faculty Exhibition 2011 will take place from July 2 to August 5, 2011 at the Rails End Gallery & Arts Centre, 23 York St., Haliburton, Ontario. Faculty will participate in a weekly meet & greet at the gallery on Tuesdays from 4:30-6:00 p.m.
.

PASSAGE: HSTA Faculty Exhibition – June 30-July 30, 2010

There are times when a call for entry with a specific theme is put out and I draw a complete blank.  I go through all kinds of contortions trying to come up with some sort of inspiration, and then what I end up with looks equally tortured! So I was really excited when, upon finding out out last summer that the theme for this year’s HSTA Faculty Exhibition was going to be “Passage”, I immediately had an idea.

A former boss made the comment to me once that we are all dependent on the products of mining:  “If it can’t be grown, it has to be mined,” he said.  While this statement could almost be considered a universal truth, it is particularly true for jewelers.

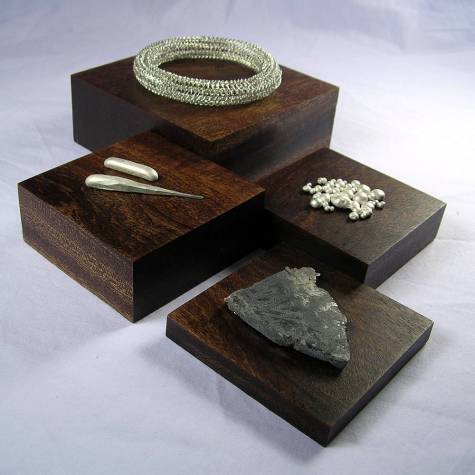
I wanted to show a piece through various stages of its development – the passage from ore to granule, from granule to ingot, from ingot to wire, from wire to jewelry.

Having attended a number of fine craft exhibitions during my time with The Metal Arts Guild of Canada, one thing that has always struck me is how jewellers have dealt with the issue of effectively displaying something so small.

The first MAG show I attended, Behind Glass (2000), directly challenged the problem by asking everyone to display their pieces in shadow boxes.  The pieces I remember were a silhouette of a person – a brooch in silver – attached to a picture of a beach, to give the illusion of it standing at the water’s edge.  Another entry was a ring topped by a tiny sewing machine displayed in front of a old photograph of the artist’s grandmother, who loved to sew.

At the most recent exhibition, MAGC 2067:  Crafting the Future, several of the artists included supplementary props with their pieces.  Anne Lumsden’s piece was displayed over a bed of zebra mussel shells.  Rosalyn Woo’s award winning brooch, “Dear Linda” was envisioned as a birthday gift for its fictitious namesake, and included the “letter” written by the “maker”, Jacob.  Some might argue that the props detracted from the work – turning them into sculpture rather than jewelry – but for me, it added visual interest and helped to put the pieces into the context of the scenarios they were made to represent.

So, for this year’s HSTA Faculty Exhibition, I decided to approach my submission as jewelry cum sculpture.  The pinnacle of the Passage – and the piece that took the longest to construct – is the torus bangle.  Despite my ravings last year after a previous attempt at a torus, the thought of trying again appealed to me.

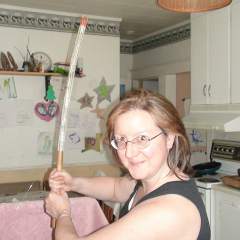
My six year old is currently obsessed with all things LEGO and Star Wars, so when I got the tube to the final length (18″/45 cm) I decided to have a little fun, and took a picture of myself in my best Jedi Princess Warrior pose.
.

My wonderful handyman husband whipped up a wooden drawplate with large holes for me.  (He loves it when I give him an excuse to buy tools!)  After drawing, the length of the tube was over 40″ (101 cm). The reason I made it that long was to give me extra material in case I had to try again.

The technique for making a seamless join is called kitchener stitching.  It’s a common knitting technique for adding pockets to sweaters, or fingers to mittens, etc.  It’s tricky to do in wire, because the wire work hardens very quickly and the join tends to have a bit of a bulge.

I made two attempts at tori before finally working out an effective way of keeping the seam from being visible.

The casting grain and ingots gave me an opportunity to feed my own tool fetish:  I now have a new ingot mold! *grin*

The silver ore came from a vendor at the Bancroft Gemboree last year.  Unfortunately, no locality info was included with the specimen, so I don’t know if the source is a Canadian mine.

The mahogany display blocks play an integral role in delineating the passage through the stages.

I am grateful to be able to work with metal and to make wearable art, and so my submission to the HSTA Faculty Exhibition is really about paying homage.

.

Passage:  From Ore to Jewelry (2010)
Silver ore, slabbed
Grains, 18.43 g, sterling silver, cast
Ingot, sterling silver, cast, 6.844 g
Ingot, sterling silver, cast, forged, drawn, 7.992 g
Torus, sterling silver, viking knit, kitchener stitching, 1.3 cm tube, 8.5 cm OD
Displays, mahogany wood, danish oil finish, various sizes

Every piece of jewelry is the end of a journey.  The metal forms as ore deep underground.  It is mined, extracted and formed into granules, then melted and cast into ingots.  The ingots are compressed and made into a usable shape.  In this case, it was drawn into wire, then knitted into a torus.

We see and admire only the final form, and acknowledge only the artist whose name is attached to it; yet the piece has been touched by many hands.  I wanted to recognize and thank those who labour behind the scenes to bring my jewelry into being.

.

PASSAGE: HSTA Faculty Exhibition
Rails End Gallery & Arts Centre
23 York Street
Haliburton, Ontario, K0M 1S0
June 30 – July 30, 2009
www. railsendgallery.com

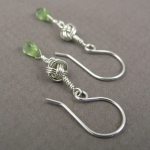
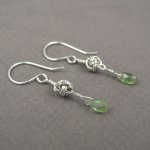
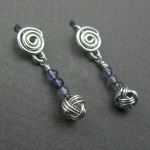
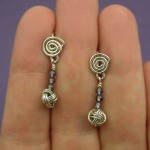
YOJ10-15 Knotted Earrings 3

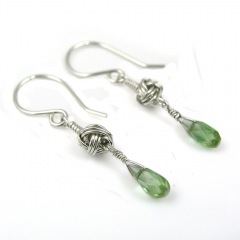
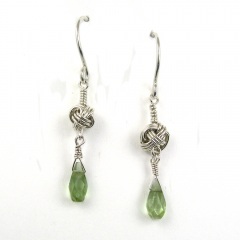
Knotted Earrings 3 (2010)
Sterling silver, fine silver, tourmaline
Constructed, cold-joined
L 3.7 cm x W 0.5 cm (W 1.45″ x L 0.2″)

Continuing on from last week, since I made several of the Monkey’s Fist knots, I made another pair of earrings!

I’ve been doing some experimenting with photography lately, putting my pieces on a white background instead of the medium gray.  I’m looking for ways to make the images “pop” more – in my recent work I’ve been using a lot of stones that have the same value as the background, and it makes the jewellery look dull.  “Value” in colour terms refers to how light or dark it is.  (To see check the value of your stone, stare at the photo with squinted eyes – if the stone disappears it has the same value as the background.)  In order for a photo to have visual interest, it has to be either lighter or darker than the background, otherwise the eyes see what’s there, but the brain registers “ho hum”.

It’s a bit more work to deal with a white background – inevitably, and even though I have a white balance setting on my camera – the raw photo comes out slightly grey.  Photoshop can adjust the balance it easily, but then I usually still have to do some extra clean up.  It’s a bit tricky to lighten the background enough to get rid of “noise” but not so much that the jewellery bleaches out.

From a print perspective, (putting on my editor hat for a moment), getting photos with white background is a godsend for layout.  I can plunk them down anywhere on a page and build text around them.  Or I can crop and put several images close together – something that isn’t possible when the jewellery is shot on a grey or staged background.   There are no distractions – you look at the jewellery and nothing else.

While they work for print and web, white backgrounds do *not* work well for jury photos.  I had the opportunity to sit in on a jury for a show recently (something I highly recommend BTW, it’s very educational), and I noticed that the photos with white backgrounds were always very jarring.  Backgrounds with a value of medium to dark (but not black) and *absolutely no props* worked best for jury photos.  Prop shots work well for Etsy, but are distracting in jury.

More photos:

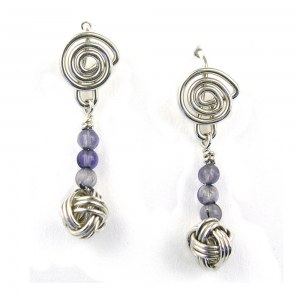
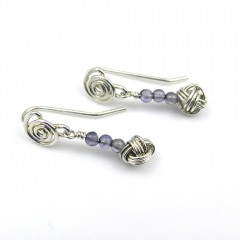
YOJ10-14 Knotted Earrings 2

Knotted Earrings 2 (2010)
Sterling silver, iolite
Constructed, cold-joined
L 2.5 cm x W 0.7 cm (L 0.98″ x W 0.275″)

My life is all about choices:  if I choose to focus on one area of my life, another area gets sacrificed.  For the past few weeks, I’ve had to focus on some group endeavours, and so my work on YOJ projects ground to a halt.  I’m working towards finding balance, but haven’t found it just yet.

For this week’s project, my focus was on making bridal jewellery.  My thoughts were on “something blue” and “tying knots”.

The Monkey’s Fist is a classic macramé knot, usually used as a weight or ornament on the end of a rope.  Tying them in rope is relatively easy.  When I learned it as a child, it was just a matter of sticking a marble between two fingers, and wrapping the rope around the marble and fingers, then around the marble through fingers and then through the loops created by the fingers.  Then the loops were pulled tight.

In wire, the stiffness of the metal, and its tendency to kink makes tying challenging.  There is also the issue of trying to get the proportions right:  thinner gauge wire is more flexible to tie, but the knot becomes very small and fiddly.  I found it impossible to tie wire around a bead without it slipping all over the place.  Pulling the loops tight at the end was also a non-starter, so I had to make the initial wraps as close to round as possible – challenging since without a bead in the centre, the tendency is to wrap ovals.  I ended up creating an invent-a-tool to help.

It took a bit of practice to get consistent results (doesn’t everything?), but I did end up with a satisfying “knot”. To get the “blue” part of the earrings, I decided on adding some pale 2 mm iolites. I would love to try these in a larger gauge of wire, but I think that would really only be possible with fine silver.  Sterling just gets too stiff too fast.

More photos:

YOJ10-13 Ancient Whispers Earrings

Ancient Whispers Earrings (2010)
Sterling silver
Constructed, cold-joined
L 4.3 cm x W 1.3 cm

It’s been another productive week here in the studio, with two new ring designs (destined for tutorials), some bridal jewelry and this pair of earrings made.

The earrings are the product of some work I’ve been doing on a proposal for a one-day course.  The idea is to teach ancient techniques.  This pattern is assumed to be ancient Egyptian.  It was all but lost to time before being reintroduced in the 1840s by the House of Castellani.   The Castellanis were greatly influenced by jewelry found in excavations of ancient Etruscan sites.  As fervent nationalists, they studied the pieces coming out of the sites, and painstakingly reproduced the jewelry, in what became known as the Italian Archeological Style.  The Museo Nazionale Etrusco di Villa Giulia in Rome has in its collection a “Prehistoric” bracelet, manufactured by Castellani, which today’s wire artists would recognize as a variant of the Egyptian scroll.

The Etruscans had trading relationships with the Syrians, Phoenicians and Greeks, who all traded with the Egyptians, so it’s conceivable that the design traveled from the Nile Basin to Ancient Italy.

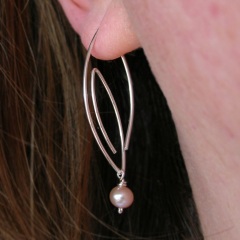
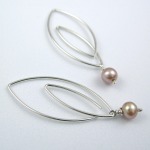
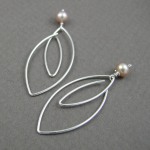
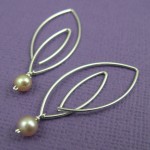
YOJ10-11 Marquise Series: Bridal Earrings

Marquise Series:  Bridal Earrings (Interchangeable) (2010)
Sterling silver, pearl
Constructed, cold-joined
L 4.0 cm x W 1.6 cm (L 1.57″ x W .55″)

I was sitting at my computer on Tuesday night, minding my own business,  when inspiration struck!  It was one of those “bolt out of the blue” ideas that forced me to get up right then, get my pliers & wire and start bending.

*Contented sigh*

I love it when that happens.

This design fulfills a long-standing desire of mine to create a pair of earrings with interchangeable bits.  The pearl drops can be removed and replaced by other drops, or can be left off altogether.  The result is a very versatile earring that can be worn with everything – from dressy to casual.

The sleek styling makes this an elegant earring for a wedding:  With the pearl, it can be worn by the bride, or without, by her bridesmaids.

These earrings are available from my Etsy Shop.

More photos:

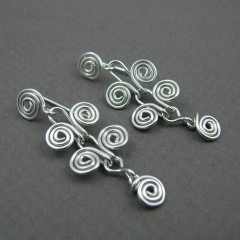
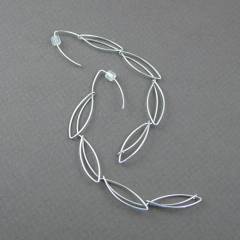
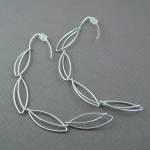
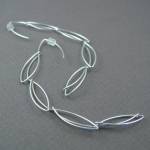
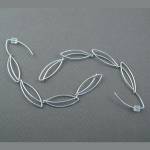
YOJ10-04 Marquise Series: Earrings 2

Marquise Series:  Earrings 2 (2010)
Sterling silver
Constructed
L 10 cm x W 0.8 cm

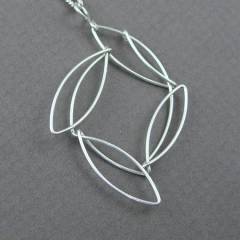
This week I decided to go back to and adapt the project I made at the beginning of this Year of Jewelry.  I wanted to explore it a bit more. The idea was to create a “string” of marquise shapes.  The result was a pendant and this pair of earrings.  They remind me a bit of palm fronds!

The most challenging part of the construction was getting each of the marquise shapes to end up on the same side, rather than having them alternate.  Made with hard wire, it had to be twisted very gently, because there was a high risk of snapping.  Getting the pattern to repeat in mirror image was also very tricky and took several tries.  (I have several pendants!  LOL)

I intended the earrings to be large and they are!  They make a very dramatic sweep from the earlobe to mid neck.

More photos:

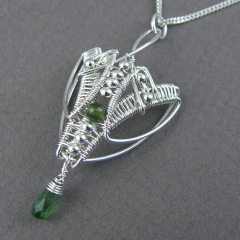
YOJ10-03 Marquise Series: Pendant 8

Marquise Series:  Pendant 8 (2010)
Sterling silver, fine silver, tourmaline
Constructed, cold-joined, woven
L 5.0 cm x W 2.25 cm x D 1.0 cm
(Update: SOLD June 2013)

One of my new year’s resolutions was to start using a Job Jar.  My family and friends, who know me very well, know that I’m hopeless about housework.  I think it was Erma Bombeck who said “Nature can’t abhor a vacuum as much as I do.”  That kind of sums up my attitude nicely.

However, I do live with three other (messy) people, so some token effort to maintain order must be made.  So… enter the Job Jar.  I wrote all the various chores on the little slips of paper, and included some fun things, and every day I pick one out of the jar.  The choice is completely random, although I like to think of it as leaving it up to God/the Universe to pick the task that is right for me on any particular day.  Some days I have more energy than others, and interestingly enough, each task so far has been perfect for the day it was chosen.  I do my Job Jar job early in the day, and then the rest of the day is mine to do as I please.

The net result of doing my housework this way is that I’m being much more productive with my jewellery making as well.  So, I feel good because my house is slowly getting cleaner, and I’m getting to work guilt-free on something I love every day.  Bonus!

The studio gremlins paid a me a visit this week and stole this piece for a few hours.  I noticed it was missing after my husband had done a sweep through the house collecting detritus to put out in the garbage on Monday night.  He tends to be somewhat brisk and indiscriminate when he does this.  A frantic search turned up nothing, and I was resigned to it having disappeared into the mass of trash.  On Tuesday, my job from the Jar was “Clean the livingroom.”  It was like a bunch of angels were standing around saying “We want to help you”.  LOL

So, I set to work, cleaning, sweeping and reorganizing the room.  When I picked up and moved one of the toy boxes, lo and behold, there was the pendant!  With a quick prayer of thanks, I put it in a safe location, where I knew I’d find it again.

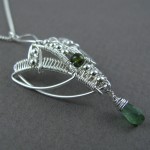
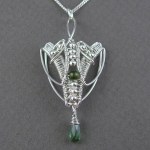
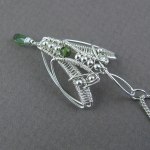
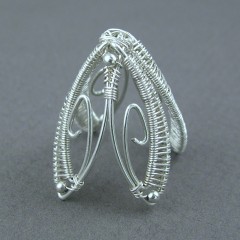
Like the previous pieces in the series, the pendant is formed using a marquise shape.  When I was first shaped the wire, I thought the pendant looked like a moth.  The form evoked a very strong Art Nouveau influence.  As I added the weaving and the beads, the moth form persisted, and I noticed that the pendant was starting to look like Rainbow Wrapping.

Originally, I was going to hang the pendant the other way around, from the point.  It reminded me of the Star Trek logo.  I didn’t like how the tourmaline drop looked hanging from the long tail though – it threw off the balance.  So the drop was moved to the point, and the tail became the hanging point.

While photographing the piece today, I started seeing the form of an elephant face.   How cool!  I don’t remember ever seeing so many different influences in one piece.

What do you see?  Let me know!

More photos:

YOJ10-02 Marquise Series: Bead Cap 1

Marquise Series: Bead Cap 1 (2010)
Sterling silver, fine silver
Constructed, cold-joined, woven
L 2.7 cm x W 2.6 cm

Last week’s project was about going beyond a simple marquise shape to a compound shape.  This week, I’m going a step further and moving into working in 3D.

The original germ for this piece was a project I made in 2003 as a Secret Santa gift.  The Cathedral Egg Pendant was made of two pieces, connected with bead links.  Cathedral Egg was inspired by a piece, called “Gluttony”, which I had made for the “Heavenly Virtues/Deadly Sins” exhibition presented by Object Design Gallery the same year.

The ladder weaving here was very time consuming to do, but the effect is so nice!

I think this really needs to grace a fabulous lampwork bead by some superbly talented artist.  The problem I’m finding is that I need a big bead:  the base of this bead cap is almost (2.5 cm (1 inch) across.  So, I’m on the hunt for something appropriate.  It still needs to go into the tumbler to shine it up, but I wanted to get it posted.

Other views:

YOJ10-01 Marquise Series: Pendant 7

Marquise Series: Pendant 7 (2009)
Sterling silver
Constructed, cold-joined
L 5.2 cm X W 3.3 cm

I made this pendant in the early part of the week, knowing that the first project for the new YOJ was due today.  Up to now, I’ve been working with marquise shapes as single pieces, either as pendants on their own, or linked together in a bracelet.  This one is a compound structure, made from one piece of wire.  It took a bit of torturing to get it to look like this, LOL, but I like how it resembles a whirligig.

YOJ09-52 Marquise Series: Pendant 6

Marquise Series:  Pendant 6 (2009)
Sterling silver, ribbon
Constructed, cold-joined
L 9.8 cm x W 3.4 cm/Ribbon: L 52 cm x W 3.0 cm

.
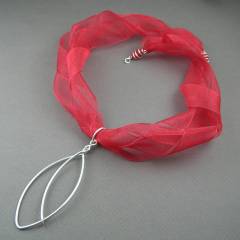
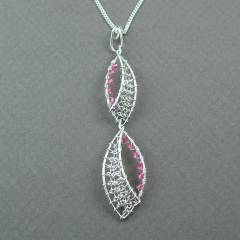
My ex-husband used to say “Go Big or Stay Home”, so I’m finishing off the Year of Jewelry 2009 with a super-sized version of the Marquise Pendant.  This started off as an experiment to see if the basic marquise shape would translate to a bangle, but I haven’t worked out the kinks to that yet.

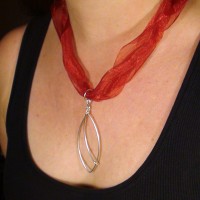
I also decided to give the ribbon necklace another try, although again, it’s technically uneconomic to make.  Ah well, I wanted to finish up the year in style!  LOL

Here’s another shot of what it looks like on:

And so this very challenging year comes to an end.  I’ll have a look back over the year and post some thoughts about what I achieved.

Until then, I wish you and those close to you a very Happy New Year, filled with enough challenge to keep you interested, and enough joy to keep you inspired!

All the best in 2010!

YOJ09-51 Marquise Series: Pendant 5

Marquise Series:  Pendant 5 (2009)
Sterling silver, fine silver, Swarovski crystal
Constructed, cold-joined, nalbinding
L 6.5 cm x W 1.3 cm

This pendant is made of two “recycled” pieces from Bracelet 3, which didn’t match the other links.  Initially I only added the Swarovskis as embellishment, but the pendant looked unbalanced.  So I decided to add some viking knitting – nalbinding – and create a ribbon-like effect.  The work involved in adding the nalbinding bumps this up from production piece to a “couture” One of a Kind or Limited Edition.

I’m not completely satisfied with how it turned out, but I’m also not able to define what is bothering me about it.   It might just be that it doesn’t work as a pendant.  The design would certainly make a fabulous pair of earrings.  Comments are welcome!