The blog has been quiet for a long time, but I’m still here :)

Yes, it’s been a long time since I’ve posted anything to this blog.

In fact, I’m kind of shocked to see that this is the first post I’ve made in over a year!

There have been lots of things going on behind the scenes, some personal, some professional.

On the personal side, I spent a good part of last year recovering from an accident – I was hit by a van while crossing the street. Although I wasn’t seriously injured at the time, I developed complications later that required many months of painful physiotherapy. I’m happy to say that I’m now almost fully recovered and pain free!

I spent a bit of time traveling in Europe, soaking in the atmosphere and the history, celebrating birthdays with family, meeting some of my online friends face-to-face for the first time.

On the professional side, live classes have been the focus for the past year. One of my long-time students, Camilla Gryski, completed her course of study with me and last June celebrated her “graduation” with a very successful gallery show. I’m enormously proud of her!

Right now, I’m hard at work on preparing for a new course I’ll be teaching at Haliburton School of the Arts this coming July: Wire Weaving & Coiling. This course will introduce students to the foundations skills used to create wire jewellery using weaving and coiling techniques. If you’re looking for a chance to get away, come join me in Haliburton from July 20-24!

I’m also hosting the Year of Jewelry Project 2015, which is now on Facebook.

Finally, I’m up to my neck in renovations! After many years of thinking and planning, I’ve finally been able to design a dedicated workspace, with everything exactly where I need it. My new studio is taking shape, and I’m looking forward to moving into my new space by the start of summer!


Registration Now Open for Haliburton Wire Jewellery Aug. 1-5, 2011

[galleryview id=19]

Registration for Wire Jewellery at Haliburton School of the Arts has begun!

Nestled in the Haliburton Highlands in the heart of Ontario’s Cottage Country, the Haliburton School of the Arts offers week long and weekend courses in everything from painting to glassblowing to blacksmithing.  I’m pleased to be returning to HSTA for the week of August 1-5  to teach wire jewellery!  Come join me for a week of fun and fabulous jewelry-making!  You’ll make earrings, chains, bracelets and pendants in a relaxed and enjoyable learning environment.

Please see my Classes page for more information.

PASSAGE: HSTA Faculty Exhibition – June 30-July 30, 2010

There are times when a call for entry with a specific theme is put out and I draw a complete blank.  I go through all kinds of contortions trying to come up with some sort of inspiration, and then what I end up with looks equally tortured! So I was really excited when, upon finding out out last summer that the theme for this year’s HSTA Faculty Exhibition was going to be “Passage”, I immediately had an idea.

A former boss made the comment to me once that we are all dependent on the products of mining:  “If it can’t be grown, it has to be mined,” he said.  While this statement could almost be considered a universal truth, it is particularly true for jewelers.

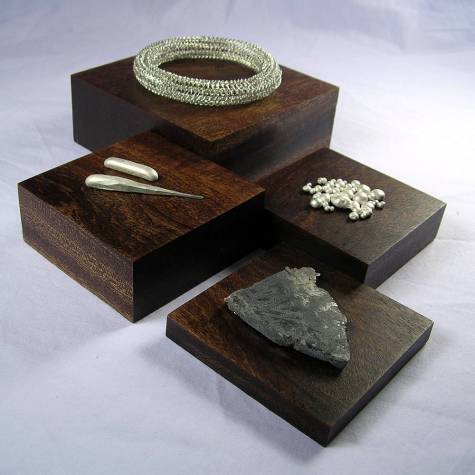
I wanted to show a piece through various stages of its development – the passage from ore to granule, from granule to ingot, from ingot to wire, from wire to jewelry.

Having attended a number of fine craft exhibitions during my time with The Metal Arts Guild of Canada, one thing that has always struck me is how jewellers have dealt with the issue of effectively displaying something so small.

The first MAG show I attended, Behind Glass (2000), directly challenged the problem by asking everyone to display their pieces in shadow boxes.  The pieces I remember were a silhouette of a person – a brooch in silver – attached to a picture of a beach, to give the illusion of it standing at the water’s edge.  Another entry was a ring topped by a tiny sewing machine displayed in front of a old photograph of the artist’s grandmother, who loved to sew.

At the most recent exhibition, MAGC 2067:  Crafting the Future, several of the artists included supplementary props with their pieces.  Anne Lumsden’s piece was displayed over a bed of zebra mussel shells.  Rosalyn Woo’s award winning brooch, “Dear Linda” was envisioned as a birthday gift for its fictitious namesake, and included the “letter” written by the “maker”, Jacob.  Some might argue that the props detracted from the work – turning them into sculpture rather than jewelry – but for me, it added visual interest and helped to put the pieces into the context of the scenarios they were made to represent.

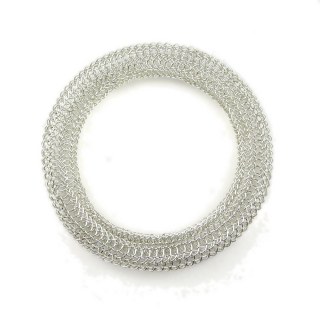
So, for this year’s HSTA Faculty Exhibition, I decided to approach my submission as jewelry cum sculpture.  The pinnacle of the Passage – and the piece that took the longest to construct – is the torus bangle.  Despite my ravings last year after a previous attempt at a torus, the thought of trying again appealed to me.

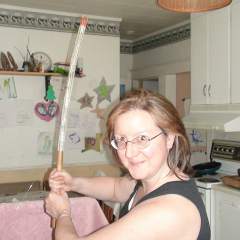
My six year old is currently obsessed with all things LEGO and Star Wars, so when I got the tube to the final length (18″/45 cm) I decided to have a little fun, and took a picture of myself in my best Jedi Princess Warrior pose.
.

My wonderful handyman husband whipped up a wooden drawplate with large holes for me.  (He loves it when I give him an excuse to buy tools!)  After drawing, the length of the tube was over 40″ (101 cm). The reason I made it that long was to give me extra material in case I had to try again.

The technique for making a seamless join is called kitchener stitching.  It’s a common knitting technique for adding pockets to sweaters, or fingers to mittens, etc.  It’s tricky to do in wire, because the wire work hardens very quickly and the join tends to have a bit of a bulge.

I made two attempts at tori before finally working out an effective way of keeping the seam from being visible.

The casting grain and ingots gave me an opportunity to feed my own tool fetish:  I now have a new ingot mold! *grin*

The silver ore came from a vendor at the Bancroft Gemboree last year.  Unfortunately, no locality info was included with the specimen, so I don’t know if the source is a Canadian mine.

The mahogany display blocks play an integral role in delineating the passage through the stages.

I am grateful to be able to work with metal and to make wearable art, and so my submission to the HSTA Faculty Exhibition is really about paying homage.

.

Passage:  From Ore to Jewelry (2010)
Silver ore, slabbed
Grains, 18.43 g, sterling silver, cast
Ingot, sterling silver, cast, 6.844 g
Ingot, sterling silver, cast, forged, drawn, 7.992 g
Torus, sterling silver, viking knit, kitchener stitching, 1.3 cm tube, 8.5 cm OD
Displays, mahogany wood, danish oil finish, various sizes

Every piece of jewelry is the end of a journey.  The metal forms as ore deep underground.  It is mined, extracted and formed into granules, then melted and cast into ingots.  The ingots are compressed and made into a usable shape.  In this case, it was drawn into wire, then knitted into a torus.

We see and admire only the final form, and acknowledge only the artist whose name is attached to it; yet the piece has been touched by many hands.  I wanted to recognize and thank those who labour behind the scenes to bring my jewelry into being.

.

PASSAGE: HSTA Faculty Exhibition
Rails End Gallery & Arts Centre
23 York Street
Haliburton, Ontario, K0M 1S0
June 30 – July 30, 2009
www. railsendgallery.com

YOJ09-32 Cooked Copper Bangle

Cooked Copper Bangle (2009)
Copper
Constructed, cold joined
L 22 cm x W 3.0 cm

During week 2 of my stay in Haliburton, one of the students taking my Wire Jewellery II class, Barbara-Joy Peel, showed us some pieces she had made in copper.  The pieces had a really fabulous patina, which she said she achieved by “cooking” the copper in a frying pan.  On the last day of the class, she brought in an iron frying pan, borrowed a hot plate from the Teen Cuisine class, and we tried out the technique for ourselves.

What fun!  The copper changes colours gradually, going from copper, to orange, to yellow, to red, to purple, and then to dark blue.  The dark blue turns silvery when the piece cools.  If the piece doesn’t lie flat, then the result is a mottled colouration.

For week 32, I decided to try it again.  I made a bangle, and cooked it.  I think this is a really cool technique which I’m going to experiment with more.

Jewellery now available at Ethel Curry Gallery, Haliburton

I’m pleased to announce that my jewellery is now available for sale through The Ethel Curry Gallery in Haliburton, Ontario.

The Ethel Curry Gallery
94 Maple Avenue,
Haliburton, Ontario
www.theethelcurrygallery.com

You’ll find other venues where you can buy my work by clicking on the “Shop” tab on my main blog page.

YOJ09-29 Freeform Bangle

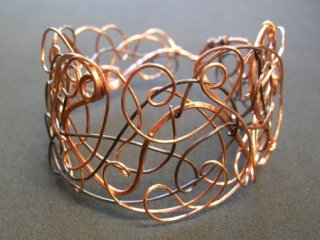
Freeform Bangle (2009)
Copper
Constructed, cold joined, liver of sulphur patination

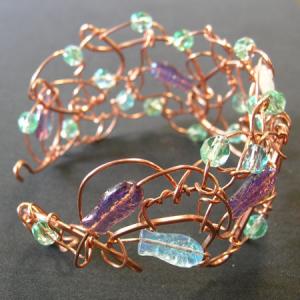
I’ve been in Haliburton for the last week teaching the Wire Jewellery course, so this week’s entry is one of the projects made during the week.  This is the “freeform” bangle we made on Thursday.

Week 2 and Wire Jewellery II start tomorrow.  Four of the ladies from last year have signed up again, and one from last week is in the class as well.  So there are going to be lots of familiar faces!

I’ll write more about the classes after next week when I’m home again.

YOJ09-02 Standard Form Ring

Standard Form Ring (2009)
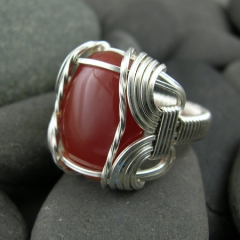
Sterling silver, carnelian
Size 10

I wasn’t intending to post this as my second entry for the YOJ, but it’s now Sunday, the due date for this week, and the piece I actually wanted to post isn’t finished.  I’m “tweaking”.  It feels very much like I’m doing a science experiment.

So… in the meantime…

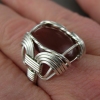
I’m going to be teaching at Haliburton again this summer, and I have a bunch of tutorials I need to write in preparation for the class.  Last fall I proposed a second level wire jewelry course, which was accepted.  One of the projects is going to be the Standard Form Ring, aka Pharaoh’s Ring.  (Why it’s called the “Pharaoh’s Ring” is a mystery:  I haven’t been able to find any historical examples using wire.  References to cast versions, yes, wire, no…).  It’s called the “Standard Form Ring” because it’s one of the all-time classic wireworking ring patterns.  A version of this ring was published in Moods in Wire by Ellsworth Sinclair, Beginning Wirecraft by Jessie Donnan, and in the Wire Artist Jeweller Magazine (June 2003).  It’s a substantial ring, usually worn by men.  I started writing my version this week, in between printing off “printing sheets” for Number 2 Son, who likes to do “homework”.

(Edit Jun. 25/09:  Thanks to some excellent detective work by Helen Goga, a historical reference for the Standard Form Ring has been found!  Mr. Thomas Vincent Phelan received a patent for the ring design (US Des. 150,726) in August 1948.  The patent lasted for 14 years, and the design went into the public domain in 1962.)

My own personal artistic proclivities don’t lean towards classical wirework, so I haven’t made this type of ring before.  I followed the WAJ instructions for my first two attempts.  I often tell my students that they shouldn’t worry about what their first attempt looks like:  usually with the first one, you’re just trying to get your head around the steps, so clumsiness is part of the process.  It’s no different for me.  This ring was attempt number 3… and I’ll likely make at least two more in the process of refining, writing and photographing the steps for the instructions.

There are useful wireworking skills to be learned from doing this project.  There are definitely some “tricks” to getting it to look nice.  Notes are being scribbled…

Some other views:

Haliburton Class – July 21-25, 2008

JUST CONFIRMED!

I will be teaching the Wire Jewellery Course at the Haliburton School of the Arts, July 21-25, 2008. Here’s the course description from the Fleming College website:

Wire Jewellery

July 21, 2008

Course Number: ARTS0676

Section Number: 41

Please note: This course requires extensive use of hand tools (wire cutters, pliers) and a healthy level of manual dexterity. Start with the basics and learn to create and design your own jewellery using wire. Go from traditional wire wrapping techniques to original, free-form methods, or something in between. Emphasis will be based on creating pieces that reflect your individuality and personal tastes. No soldering is required and you will have the opportunity to incorporate beads, stones, and found objects to make your own unique designs. Basic hand tools and the use of some interesting tricks will enable you to continue upon completion of the course. Personal style and creativity will be encouraged in a relaxed atmosphere.

Please Note: There will be a $65 material fee payable to the instructor.

  • Welcome & Material List
Cost: $252.70
Hours: 47.50
Location: HALIBURTON
Starts: July 21, 2008
Duration: 47.50 hours
Day/Time: Monday, Tuesday, Wednesday, Thursday, Friday (09:00AM – 04:30PM)
Click for further information about Haliburton School of the Arts and to find out how to register.