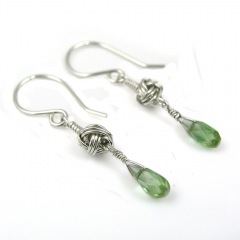
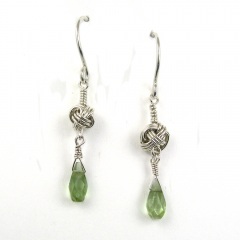
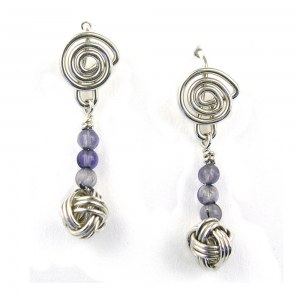
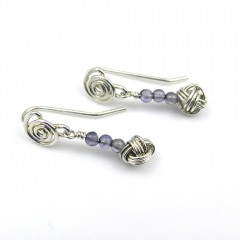
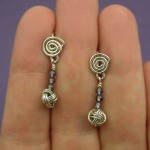
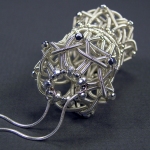
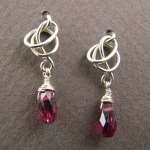
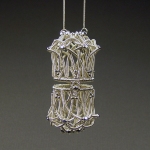
YOJ10-15 Knotted Earrings 3

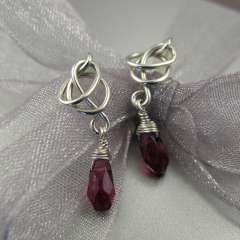
Knotted Earrings 3 (2010)
Sterling silver, fine silver, tourmaline
Constructed, cold-joined
L 3.7 cm x W 0.5 cm (W 1.45″ x L 0.2″)

Continuing on from last week, since I made several of the Monkey’s Fist knots, I made another pair of earrings!

I’ve been doing some experimenting with photography lately, putting my pieces on a white background instead of the medium gray.  I’m looking for ways to make the images “pop” more – in my recent work I’ve been using a lot of stones that have the same value as the background, and it makes the jewellery look dull.  “Value” in colour terms refers to how light or dark it is.  (To see check the value of your stone, stare at the photo with squinted eyes – if the stone disappears it has the same value as the background.)  In order for a photo to have visual interest, it has to be either lighter or darker than the background, otherwise the eyes see what’s there, but the brain registers “ho hum”.

It’s a bit more work to deal with a white background – inevitably, and even though I have a white balance setting on my camera – the raw photo comes out slightly grey.  Photoshop can adjust the balance it easily, but then I usually still have to do some extra clean up.  It’s a bit tricky to lighten the background enough to get rid of “noise” but not so much that the jewellery bleaches out.

From a print perspective, (putting on my editor hat for a moment), getting photos with white background is a godsend for layout.  I can plunk them down anywhere on a page and build text around them.  Or I can crop and put several images close together – something that isn’t possible when the jewellery is shot on a grey or staged background.   There are no distractions – you look at the jewellery and nothing else.

While they work for print and web, white backgrounds do *not* work well for jury photos.  I had the opportunity to sit in on a jury for a show recently (something I highly recommend BTW, it’s very educational), and I noticed that the photos with white backgrounds were always very jarring.  Backgrounds with a value of medium to dark (but not black) and *absolutely no props* worked best for jury photos.  Prop shots work well for Etsy, but are distracting in jury.

More photos:

YOJ10-14 Knotted Earrings 2

Knotted Earrings 2 (2010)
Sterling silver, iolite
Constructed, cold-joined
L 2.5 cm x W 0.7 cm (L 0.98″ x W 0.275″)

My life is all about choices:  if I choose to focus on one area of my life, another area gets sacrificed.  For the past few weeks, I’ve had to focus on some group endeavours, and so my work on YOJ projects ground to a halt.  I’m working towards finding balance, but haven’t found it just yet.

For this week’s project, my focus was on making bridal jewellery.  My thoughts were on “something blue” and “tying knots”.

The Monkey’s Fist is a classic macramé knot, usually used as a weight or ornament on the end of a rope.  Tying them in rope is relatively easy.  When I learned it as a child, it was just a matter of sticking a marble between two fingers, and wrapping the rope around the marble and fingers, then around the marble through fingers and then through the loops created by the fingers.  Then the loops were pulled tight.

In wire, the stiffness of the metal, and its tendency to kink makes tying challenging.  There is also the issue of trying to get the proportions right:  thinner gauge wire is more flexible to tie, but the knot becomes very small and fiddly.  I found it impossible to tie wire around a bead without it slipping all over the place.  Pulling the loops tight at the end was also a non-starter, so I had to make the initial wraps as close to round as possible – challenging since without a bead in the centre, the tendency is to wrap ovals.  I ended up creating an invent-a-tool to help.

It took a bit of practice to get consistent results (doesn’t everything?), but I did end up with a satisfying “knot”. To get the “blue” part of the earrings, I decided on adding some pale 2 mm iolites. I would love to try these in a larger gauge of wire, but I think that would really only be possible with fine silver.  Sterling just gets too stiff too fast.

More photos:
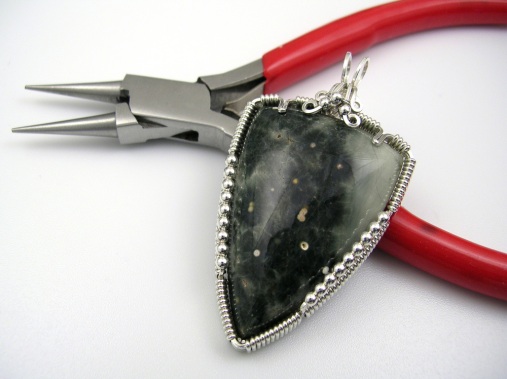
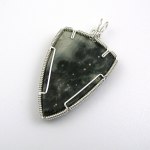
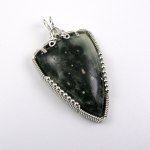
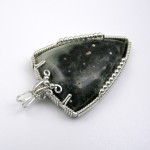
YOJ10-12 Ocean Jasper Pendant

Ocean Jasper Pendant (2010)
Sterling silver, fine silver, ocean jasper
Constructed, cold-joined
L 5.4 cm x W 3.0

I’m in production mode, building up some stock, and that means digging through my stash of stones.  I came across this ocean jasper, which I bought last year from a fellow member of the International Guild of Wire Jewelry Artists.

I’m not normally an ocean jasper fan, but every time I look at this cab, I see celestial clouds and galaxies.  It draws me in, and I can imagine that I’m looking into the vastness of outer space. This is a really special stone.

Generally, my preference when setting is to leave as much of the surface exposed as possible. I also tend to favour the more substantial, heavier bezels achieved by doing binding wrapping all around the stone.  It would have been easiest with a straight prong setting, but I wanted to add the beads to create some visual interest.  They are structural in that they act almost like prongs, holding the stone, but they also add beautiful decoration.

Corners are challenging to get tight, and I’m happy to have managed a secure fit around these.  I don’t have a lot of experience setting stones with points – most of the time the stones I deal with are round, oval or teardrop shaped.

I’m undecided if I should hang this on a viking knit chain, or on a strand of ocean jasper beads. Thoughts anyone?

All in all, I’m very pleased with how this turned out.  Even my husband, who has a decided bias towards using a torch, likes the setting – very high praise indeed!

More photos:
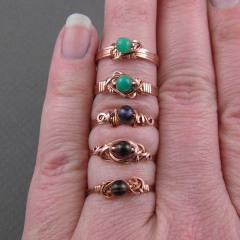
YOJ10-10 Ring Week at the Studio

Copper Single Bead Rings (2010)
Copper, iolite, smoky quartz, amazonite
Constructed, cold-joined
Various sizes

It’s ring week here at the studio!

For a long time, I’ve been wanting to develop an original method for constructing a single bead ring, so this week I spent some time playing around with a couple of ideas.  The one I teach in my course at George Brown College is Mavis Llewellyn’s One Bead Ring (published in The Wire Artist Jeweller, September 1999).  According to her daughter Susan, Mavis developed the design back in the late 70s-early 80s as a quick-to-make-project to sell at shows.

Other single bead ring patterns are easier to make (i.e. 3-minute ring), but the shanks (to my eye) are sloppy looking.  In square wire, they often look tortured. If you’re looking for something quick and dirty to sell for $8 and you work “organically”, then Bob’s Your Uncle…

The thing I like most about Mavis’ design is how elegant it looks, especially the shank.  The ones I produced this week haven’t achieved anything resembling elegance or consistency yet, but I’m happy to have made progress.

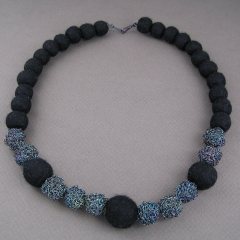
YOJ10-09 Felt & Crochet Bead Necklace

Felt & Crochet Bead Necklace (2010)
Fine silver, merino wool, Beadalon stringing material, crimp beads
Crochet, felted, assembled
L 47.31 cm x 17 mm (largest bead)

I mentioned in my Week 6 post that I was making felted beads, and now I can share the results of that effort.  Initially I was going to pair the felted beads with the crochet beads just as I’d made them, in fine silver white.  Then it occurred to me that over time, the silver is going to tarnish, and the necklace will be difficult to clean without taking it apart.

The solution was to add LOS to the silver.

Liver of sulphur stinks to high heaven, but it creates such interesting effects, especially when a bit of salt is added into the solution!  I love how the colours change, and in this case, how they became mottled in the purple-blue range.

A friend of mine asked me to produce a bunch of pieces for her to use in the fall for a fashion show, so this is going to be one of the things I send her.  It’s not my typical style, but it will work well with the clothing being shown.

More photos:
YOJ09-51 Marquise Series: Pendant 5

Marquise Series:  Pendant 5 (2009)
Sterling silver, fine silver, Swarovski crystal
Constructed, cold-joined, nalbinding
L 6.5 cm x W 1.3 cm

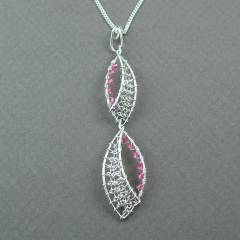
This pendant is made of two “recycled” pieces from Bracelet 3, which didn’t match the other links.  Initially I only added the Swarovskis as embellishment, but the pendant looked unbalanced.  So I decided to add some viking knitting – nalbinding – and create a ribbon-like effect.  The work involved in adding the nalbinding bumps this up from production piece to a “couture” One of a Kind or Limited Edition.

I’m not completely satisfied with how it turned out, but I’m also not able to define what is bothering me about it.   It might just be that it doesn’t work as a pendant.  The design would certainly make a fabulous pair of earrings.  Comments are welcome!

YOJ09-50 Marquise Series: Bracelet 3

Marquise Series: Bracelet 3 (2009)
Sterling silver, copper, fine silver
Constructed, cold-joined
L 16.8 cm x W 1.1 cm

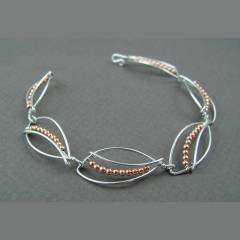
For this piece, I took the idea developed in Week 48 and extended it to a bracelet.  The design looks simple, yet it surprised me how much work was involved in adding the copper beads.

I like the bi-metal toning – it’s a nice effect, and would really sparkle on tanned, warm toned or dark skin.

Like the project in Week 45, I alternated the links in mirror image; however, the alternating pattern sets up an issue for sizing.  I noticed it with the Week 45 bracelet as well, but because it’s all one metal it’s not as obvious.   With this bracelet, because there are two metals, it becomes clear that there can’t be an odd number of links: it throws off the pattern.  This design will fit either a very small wrist (like this bracelet does), or a very large wrist.  On my wrist, which is a little thinner than standard, but not small, the bracelet fits comfortably with room to move easily, but I generally like to wear my bracelets loose so that they jingle.

The design would look stunning with the Swarovskis I used in Week 48, but adding them will also add to the price of the finished piece.  If you’re interested in a Swarovski version, please email me for a quote.

YOJ09-49 Marquise Series: Pendant 4

Marquise Series:  Pendant 4 (2009)
Sterling silver
Constructed, cold-joined
L 3.6 cm x W 1.6 cm

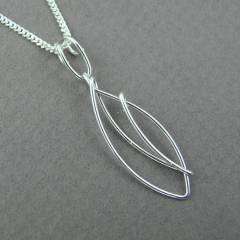
Here is one more variation in sterling silver.  The original idea was to add a 2 mm Swarovski crystal, similar to what I did in the Week 47 project, but I ended up deciding against it.

YOJ09-47 Marquise Series: Pendant 2

Marquise Series:  Pendant 2 (2009)
Sterling silver, fine silver, Swarovski crystal
Constructed, cold-joined
L 3.4 cm x W 0.9 cm

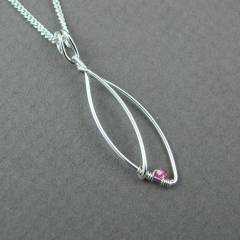
I’m still working along the lines of “quick and simple” for this series, but this time, I wanted to add a tiny splash of colour.

Still trying to keep the cost of the pendant down, I didn’t want to spend too much time on the coiling, so I added only one little Swarovski, strategically placed.

I bought a bunch of these 2 mm Swarovskis back in the late spring when I was preparing for my class at Haliburton.  I hadn’t intended to buy them, but when the supplier I was visiting only had half the tools in stock that I needed, I had to choose some other things to bump up my purchase to their minimum order requirement.  (It’s incredibly irritating when the stuff is shown in stock on the website, only to discover empty bins when you get there.  Unfortunately, this is not an unusual occurrence with this particular supplier, which is why I always go in person, and I don’t shop there unless absolutely necessary.)  They are one of the few officially sanctioned wholesale suppliers of Swarovski and Preciosa, so I picked up a few packages.

After several different attempts, I also finally came up with a nice bail that compliments the marquise shape of the pendant.

YOJ09-41 Goddess Jewels

Goddess Jewels (2009)
Constructed, cold joined
Sterling silver, Preciosa crystal

The opening of the Metal Arts Guild of Canada exhibition “MAGC 2067 – Crafting the Future”, held on November 7 at Arta Gallery in Toronto, was a costume ball.  In connection with the theme of the show, people were encouraged to dress up in character.

I originally planned to wear a costume, but then, in the week before the opening, the issue I had been dealing with in my personal life came to a head.  Although able to attend, I didn’t have the emotional or physical energy to dress up.

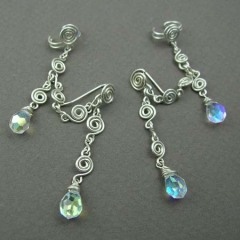
My character was “an acolyte of the Goddess” – a jewellery maker for a matriarchal society devoted to worshiping a Gaia-centred deity.  As part of the costume, I made a couple of “Goddess Jewels”.  These are very loosely based on Bajoran earrings, of Star Trek fame.  My version has a chain of handmade spirals, two Preciosa crystal drops, because I love dangles and sparklies, and is worn via an earcuff on the centre of the ear, and a spiral earwire through the lobe.

I used to wear these a lot, and had forgotten how much fun they are.  It’s been several years since I made one.  Usually only worn on the left side, this time I wanted the pair.  Someone took this photo of me at the opening, where you can see one of them.  The whole set of photos from the show is worth a peek.

YOJ09-40 Knotted Tourmaline Earrings

Knotted Tourmaline Earrings (2009)
Constructed, cold joined
Sterling silver, fine silver, tourmaline

Recently members of the Starving Artists Etsy Team did a critique of my Etsy shop.  One of the comments that came up a couple of times was that my descriptions tend to be a bit on the sparse side.  I generally give information about the piece, what it’s made of, basic sizing, etc., but only rarely is there a “story”.

My reply to one of the ladies who asked me about this was “Well, sometimes the design is the result of nothing more than “I had this idea and decided to play around with it.” ”

The truth is that I just have no talent for writing bullshit.  What I write has to feel authentic, otherwise it doesn’t work for me.  Hmmm…. maybe I need to look into a creative writing course…

Anyways… I was playing around with some scraps of wire left over from working on my Clip-on Earrings tutorial.  I tied the wire up in a small knot – not quite as tight as I would have liked, but it worked.  I have a “thing” about dangles, so I added these little tourmalines.  I love the vibrant pink – they’re just juicy!  The result is a cute pair of earrings that works for everyday wear.

The SATeam critique did confirm one thing: my photography is pretty good. It never stops surprising me how much time it takes to get the photography done. Nowadays, I’m not only doing photos for my regular record keeping; I’m also doing set up for Etsy. “Product” photography is different from jury photography – attention must be paid to angles, and multiple positions. A lot of people on Etsy photograph on elaborate backgrounds. I have yet to find one that works for me, so I’m still working with the “jurying grey”.

Photographing studs is difficult at the best of times, but these earrings were particularly challenging. There was just no good way of laying them nicely to get a straight-on shot. Finally, I decided to cut a upright display card out of an old layout board and poke holes in it. Voilà! It worked!

Other views:

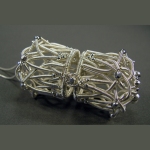
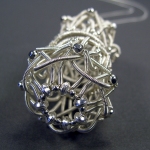
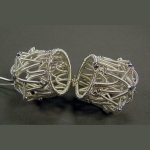
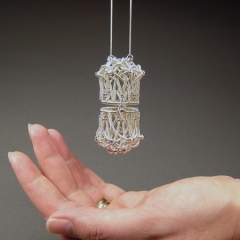
YOJ09-24 Shiva’s Pomander

Shiva’s Pomander (2009)
Fine silver, sterling silver
Pendant: L 6.1 cm x W 3.2 cm
Chain: 88 cm
Constructed, coiled, cold joined, flameworked

A little over a year ago, Perri Jackson sent me Strange Attractor, a stunning wire bead she’d made as a thank you gift for helping her with a tutorial.  Looking at it, I wondered how the structural coiling technique she used could be adapted to something other than a bead.  Something like a locket maybe… It got me puzzling…

An opportunity to experiment came in the form of a call for entry from Rails End Gallery.  Every year the gallery hosts a show featuring work by the faculty of the Haliburton School of the Arts.  This year, the theme is “Vessel”.

Originally, I had wanted to make the vessel to house this heart, but screwed up – err… made a Design Choice that ended up creating a much larger container than intended. The original design would have hung horizontally, with the chain running through the centre.  With this one, the design lends itself better to a vertical orientation.

This week when I was talking to Perri, I mentioned that I was working on a locket-type piece for the show.  She asked what it looked like.  “Sort of like a Shivalingam,” I said.

So… the piece is heading out the door today to get sent up to Haliburton.  There is, of course, the obligatory Artist Statement that goes with it:

In Hinduism, the lingam is a symbol of Shiva. Worn in a similar fashion as a Christian cross, the intent is to draw the blessings of the Higher Power to the wearer. Using structural coiling and weaving techniques developed by Perri Jackson, I decided to interpret this symbol as a pomander worn over the solar plexus. It allows the wearer to carry a prayer or fresh flowers within: a reminder to always recognize the Source of all life’s gifts.

VESSEL: HSTA Faculty Exhibition
Rails End Gallery & Arts Centre
23 York Street
Haliburton, Ontario, K0M 1S0
June 30 – July 30, 2009
www. railsendgallery.com

More photos: