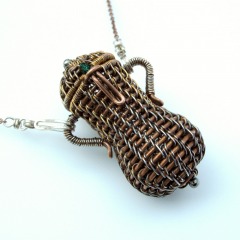
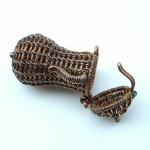
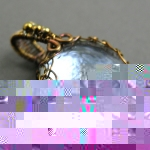
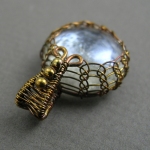
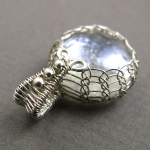
YOJ11-14 The Keeper of My Secret

The Keeper of My Secret (2011)
Copper, fine silver, sterling silver, Swarovski crystal
Formed, cold-joined, liver of sulphur and ammonia patination
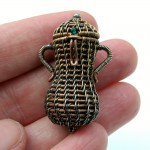
L 3.68 cm x W 2.25 cm x D 1.91 cm

After finishing the locket in Week 11 I said I wasn’t going to work on one of these again for a while, but the idea for this piece refused to stay quietly in the recesses of my mind.

I’ve been thinking a lot about secrets.  What private little treasures do we wear close to our hearts?  A note from a lover, or a totem object?  Does it contain a memory or a reminder?  The wearer gets to choose.

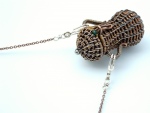
I love the shape of amphorae – very sensuous and feminine!  The construction was another learning experience – not the least reason being that I actually made the clasp properly this time.  Naturally, I now have ideas for two other projects I want to make, but those definitely have to wait until after the studio tour.

Currently available at: META4 Gallery

More photos:

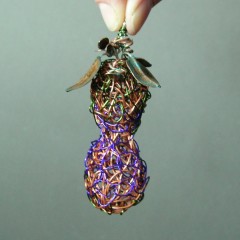
YOJ11-03 The Peanut Experiment

The Peanut Experiment (2011)
Copper, polymer-coated copper, sterling silver
Formed, fold-formed, cold-joined, fused, patinated
W 2.5 cm x H 8.5 cm

.

This week’s entry is actually the end of a several week long process where I experimented with a different method for forming.

This is an idea I’ve been wanting to try ever since seeing a website by a British artist who made life size human figures out of wire.  His name is regretfully forgotten, and the link to his website lost.  What I remember the most – besides the wonderful realism of his figures – was that he built them over a solid core, which was later burned out.

Cores are often used with metal clay for making hollow forms such as boxes or beads.  After some research, I bought some cork clay, and then promptly got too busy to go any further.

Cork clay is usually burned out in a kiln.  Since I’m not interested in making a substantial investment for something I may not stick with, I started researching low-tech alternatives.  I remembered a thread on Ganoksin about using a flower pot kiln for burning out wax.  The Ganoksin archives, while vast and wide-ranging, are frustrating to search, and didn’t provide anything really helpful.  Evenually, I found some basic information elsewhere online for building a flower pot kiln and went about collecting the materials to build one.

I wasn’t sure if the kiln would get hot enough to burn out the cork clay, so I made my first core out of bread dough.  Since it was just an experiment, I opted to do a freeform winding of copper wire around the core.

Finding an unglazed clay pot of an appropriate size in January in Canada is a challenge.  However, I did find one – and only one – at Home Depot.

Once back at home, I lined the pot with tin foil, set up the hotplate on my back deck, put a modified coffee can on the element, added the piece to be fired, covered it, and turned it on.

It smoked a lot, and stunk to high heaven, but considering it was in -12°C and blowing gusts, it worked very well!  The core-free wire looks a bit like a peanut.

Because with the YOJP, a finished piece is supposed to be submitted each week, I decided to also try my hand at making some leaves with fold forming, which were then patinated using salt & ammonia.  They were attached to the peanut and presto! a finished piece.

It’s not pretty, but it wasn’t intended to be.    My next step will be to try again with the cork clay.

Process photos:


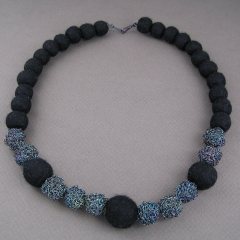
YOJ10-09 Felt & Crochet Bead Necklace

Felt & Crochet Bead Necklace (2010)
Fine silver, merino wool, Beadalon stringing material, crimp beads
Crochet, felted, assembled
L 47.31 cm x 17 mm (largest bead)

I mentioned in my Week 6 post that I was making felted beads, and now I can share the results of that effort.  Initially I was going to pair the felted beads with the crochet beads just as I’d made them, in fine silver white.  Then it occurred to me that over time, the silver is going to tarnish, and the necklace will be difficult to clean without taking it apart.

The solution was to add LOS to the silver.

Liver of sulphur stinks to high heaven, but it creates such interesting effects, especially when a bit of salt is added into the solution!  I love how the colours change, and in this case, how they became mottled in the purple-blue range.

A friend of mine asked me to produce a bunch of pieces for her to use in the fall for a fashion show, so this is going to be one of the things I send her.  It’s not my typical style, but it will work well with the clothing being shown.

More photos:

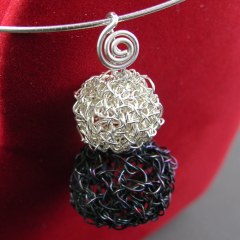
YOJ10-07 Crochet Ball Pendant

Crochet Ball Pendant (2010)
Fine silver
Constructed, crochet, liver of sulphur patination
L 3.9 cm x W 2.0 cm

The other day, while commiserating with my friend Margaret about our work loads and not seeming to be able to stop to catch a breath, she quoted back to me a comment that I’d deadpanned into one of our conversations once:

“Breathing is just sooo overrated…”

This week, I told her that I think that would make a perfect epitaph for my headstone.  That laid both of us flat with laughter.

I shouldn’t complain, because it’s self-inflicted:  I’ve taken on too many projects to try to deal with at once.  As a result, I’m struggling to do anything as effectively as I’d like.  My DH is currently working a rotating shift schedule, 4 – 12 hour days then 4 – 12 nights, which is also wreaking havoc on my regular routine.

As a result, I’m off the rails on the YOJ project.  I so want to be producing quality work, but I seem to only have time for the barest minimum, and even that seems mediocre!

In an effort to catch up, I’m going to just put together a couple of very quick pieces.  I found these little crochet balls while cleaning up the studio a week or two ago.  I made them several years ago, but the project they were intended for didn’t really work out.  I applied LOS to some of the balls, and they are being used in the project that will be posted next.  These two were left over, so I put them together to make a little pendant.

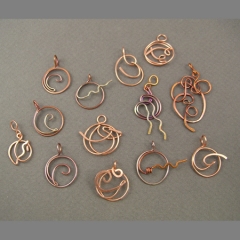
YOJ09-42 Playing with a Hammer :-)

Copper Pendants (2009)
Constructed, hammered, cold joined, heat patination
Copper
Various sizes

Still trying to play catch up on the YOJ, but I’m feeling decidedly uninspired.  So, I decided I’d break out my bench block and do some hammering on copper.  Just playing, nothing serious.

I like pieces that resulted, but realized that some of them resemble the work of Ann Wylie-Toal, a fellow Canadian whose pieces often look like gesture drawing.

To add a bit of visual interest to these, I hauled out my frying pan again and cooked the copper.  It’s so much fun watching the metal turn from orange to brown to red to purple to blue to silvery!  Unfortunately the blue is an oxide layer that wipes off very easily.  Immediately spraying with Krylon would be the only way to preserve it.  Still, I love the possibilities!

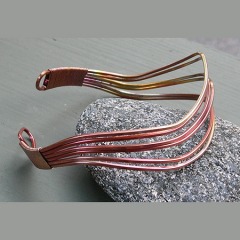
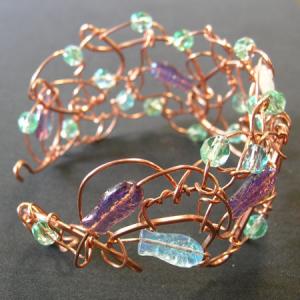
YOJ09-32 Cooked Copper Bangle

Cooked Copper Bangle (2009)
Copper
Constructed, cold joined
L 22 cm x W 3.0 cm

During week 2 of my stay in Haliburton, one of the students taking my Wire Jewellery II class, Barbara-Joy Peel, showed us some pieces she had made in copper.  The pieces had a really fabulous patina, which she said she achieved by “cooking” the copper in a frying pan.  On the last day of the class, she brought in an iron frying pan, borrowed a hot plate from the Teen Cuisine class, and we tried out the technique for ourselves.

What fun!  The copper changes colours gradually, going from copper, to orange, to yellow, to red, to purple, and then to dark blue.  The dark blue turns silvery when the piece cools.  If the piece doesn’t lie flat, then the result is a mottled colouration.

For week 32, I decided to try it again.  I made a bangle, and cooked it.  I think this is a really cool technique which I’m going to experiment with more.

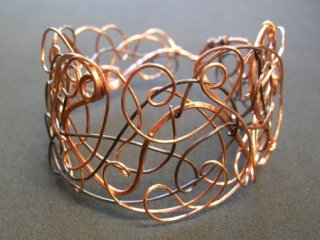
YOJ09-29 Freeform Bangle

Freeform Bangle (2009)
Copper
Constructed, cold joined, liver of sulphur patination

I’ve been in Haliburton for the last week teaching the Wire Jewellery course, so this week’s entry is one of the projects made during the week.  This is the “freeform” bangle we made on Thursday.

Week 2 and Wire Jewellery II start tomorrow.  Four of the ladies from last year have signed up again, and one from last week is in the class as well.  So there are going to be lots of familiar faces!

I’ll write more about the classes after next week when I’m home again.

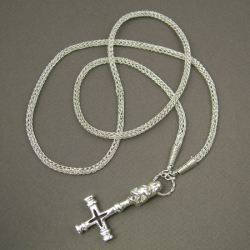
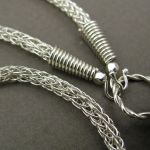
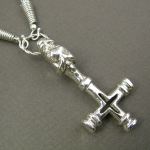
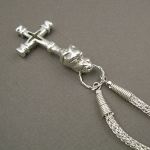
YOJ09-12 Viking Knit Chain (and “Merry Meet”)

Viking Knit Chain (2009)
Fine silver, sterling silver
Chain L 68.6 cm x W 0.35 cm
Pendant L 5.8 cm x W 2.5 cm
Nalbinding, constructed, cold-connected, flameworked, cast

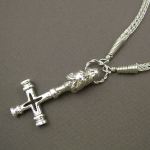
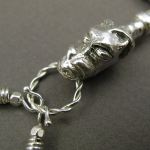
Several years ago, my husband and I collaborated on making a Thor’s Hammer.  Malcolm is fascinated by all things Norse, to the point where I’ve joked many times about him being a born-again Viking.  He carved the cross for this pendant, but struggled to model the head properly.  I came up with the idea of forming the head out of stick tack (aka white tack, blue tack etc etc), and then we cold molded the whole piece for casting.  That original was finished, and then remolded and four more pieces were cast.

Malcolm made himself a lovely chain to go with the original.  Unfortunately, our studio gremlins made off with it some time during our move, so all he has now are the copies.  Wanting to wear his Thor’s Hammer, he recently asked me to make a chain for him.

So this week, on the heels of finishing my competition entry, I decided to whip it off.  My hands are not quite recovered from the massive project, so by the time I was half way through working on this chain, I was having to put a bandaid on my pinky.  I was developing a blister from all the pulling.

My beloved husband is very happy with his new chain, and thrilled to be wearing his pendant.

Some more photos:


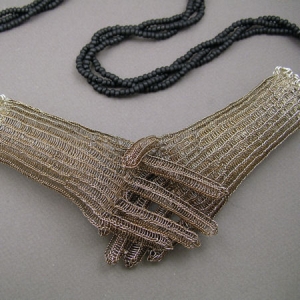
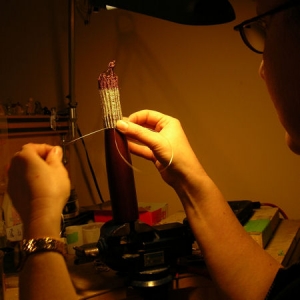
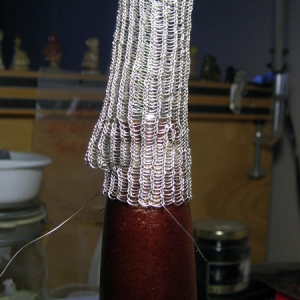
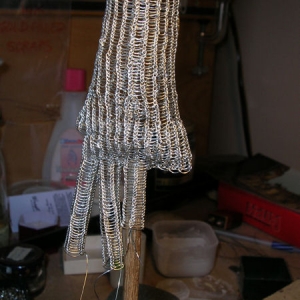
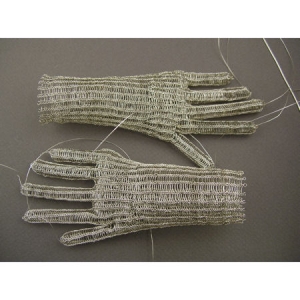
Also, as promised, I’m posting the photo of my competition entry to “Connection”, the National Juried Exhibition being held by Zilberschmuck Art Jewellery and hosted at Shao Design. The call for entry asked: “What is your interpretation of the word “CONNECTION”? Is there a connection part, link or bond? Is there an association or relationship between two or more things? Do associates, relations, acquaintances or friends influence the outcome of the piece? Is it a single connection or one of many types and kinds of connections that make up the piece? How can these ideas be formalized into a three-dimensional piece?”  My entry focused on the connection we make with each other, through a handshake. Clasping hands in greeting, in parting, in confirming business arrangements, in offering congratulations, is often the only physical connection we make with each other.
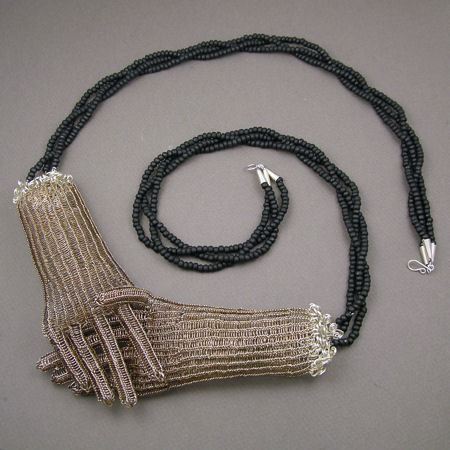
Merry Meet (2009)
Fine silver, sterling silver, glass
L 102 cm x W 7.0 cm
Nalbinding, constructed, cold-joined, liver of sulphur patination

My husband’s comment about this piece:  “It’s odd.”

Yes, but that’s  “art” jewellery for you… LOL

The hands clasp together just over the solar plexus.  If I thought anyone would wear it that way, I would have liked to turn it into a stomacher – I think it would be well suited for that – but it works as a necklace as well.

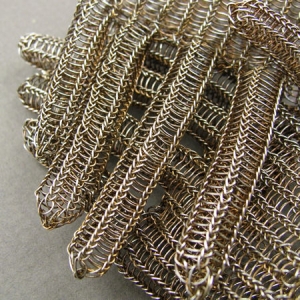
From start to finish, it took two months of solid work to construct, and is (pardon the pun) hands down, one of the most ambitious pieces I’ve ever attempted.  It’s not exactly what I envisioned – that would have taken another three months of work to complete.

As I mentioned last week, it didn’t make the final cut for the exhibition, but I’m not disappointed about that.  I am satisfied that I got it done in time for judging.

Here are more detail photos, along with shots taken during construction:

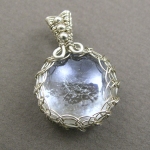
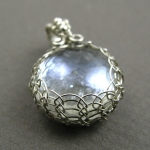
YOJ09-06 Viking Knit Pendant

Viking Knit Pendant (2009)
Sterling silver, fine silver, glass
Constructed, liver of sulphur patination
L 2.9 cm x W 1.9 cm

I’ve got Viking knitting on the brain this week, because I’m working on a competition piece that uses that technique.  It’s a slow, tedious process, but at the same time, strangely rhythmic and meditative.  So far on the competition piece I’ve used about 15 ft of wire, and have oh… 1 1/2″ (just under 4 cm) of knitting completed.

Needless to say, it’s not the piece I’m posting for this week.

Since I have my fingers suitably warmed up, I figured I’d try using the technique on a pendant, and add a woven bail.  This result is slightly different than the netted pendant I made for myself about a year ago.

I also decided to add liver of sulphur patina to it because silver and clear glass is just plain boring.  The thing I love about LOS is the range of colours that can be produced, from straw yellow to deep dark black.  My LOS is very old – so old in fact that it doesn’t dissolve properly anymore.  I mixed up a weak solution and swirled the pendant around in it.  Initially it went gold/brass coloured, but I decided I wanted to go deeper, so I popped it back in.  I like the coppery brown colour I have now.

More photos, both with and without LOS: