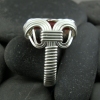
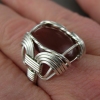
Tutorial – Sweetheart Ring

Sweetheart Ring - Tutorial Instant Download from wrapturetutorials.com

Sweetheart Ring
Level of Difficulty:  Intermediate

This little ring is very economical in its use of wire, but what a pretty result! Its look is perfect for delicate fingers, but the pattern can be easily adjusted for larger ring sizes and stones. For those who have mastered the basics and are looking to move on a new skill level, this project introduces some precise measuring and calculation.

13 pages, 45 photos, 40 steps, plus design notes

USD $15.00

Tools & Materials You’ll Need:

Tools:
Flat Nose Pliers
Round Nose Pliers
Chain Nose Pliers
Flush Cutting Wire Nippers
Vernier Caliper
Permanent Marker
Measuring Tape/Ruler
Jeweller’s File
Rouge Cloth
Wooden Ring Mandrel
1/4″ (6 mm) Masking Tape

Materials:
16″ (41 cm) 22 ga. (.65 mm) Soft Square wire
1 1/2″ (4 cm) 22 ga. (.75 x .5 mm) Half-hard half round wire
1x 6 mm facetted Cubic Zirconium or other stone

Substitutions:
Substitutions are not recommended for this project.

Available now from my Tutorials Page and in my Artfire Shop.

Tutorial – Ancient Whispers Earrings (Free)

Tutorial - Ancient Whispers Earrings

Ancient Whispers Earrings (Free download)
8 pages, 43 photos, 43 steps
Level of Difficulty:  Easy

What do these earrings remind you of?  A lady of Ancient Rome strolling in her garden, admiring the mosaics and calla lilies?  The Ionic Columns of Ancient Greece soaring above the Acropolis? Whatever springs to mind, the classics are never out of style!

It’s been quite a while since I released a free tutorial! While I put the finishing touches on my upcoming (and first!) Intermediate tutorial, I decided I’d make available this pair of earrings, which were originally featured in Week 13 the Year of Jewelry 2010.

This project was developed for a workshop I’ll be teaching this week and next at Harbourfront Community Centre in Toronto.

Tools & Materials You’ll Need:

Tools:
Flat Nose Pliers
Round Nose Pliers
Flush Cutting Wire Nippers
Permanent Marker
Measuring Tape/Ruler
Jeweler’s File
Rouge Cloth
Materials:
33 inches (75 cm) 20 gauge (.80 mm) Hard Round Wire  

Substitutions:
Half hard wire can be used for this project.

https://wrapturewirejewellery.on.ca/blog/2010/03/yoj10-13-ancient-whispers-earrings/

Click here to download!

Other tutorials (fee and free) are available on my Tutorials page.

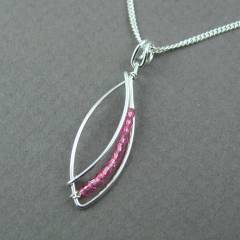
YOJ09-48 Marquise Series: Pendant 3

Marquise Pendant:  Pendant 3 (2009)
Sterling silver, fine silver, Swarovski crystal
Constructed, cold-joined
L3.5 cm x W 1.6 cm

Lots of playing going on!  I love the sparkle of Swarovskis, so I added a thin row of crystals to this next pendant in the series.  I love the classic “sweetheart” look that resulted!

Tutorial – Clip-on Earrings

For people who don’t have pierced ears, finding handmade earrings they can wear is a real challenge.  Back when I did shows, I’d occasionally get requests for clip-on findings, and lost sales because I didn’t have them.  Commercial findings were not an option for the types of shows I was doing.

So when, about a year ago, someone posted a message to one of the forums I’m on asking if there was a pattern for clip-ons, I thought “What a great idea!”.  I got out an old pair of my mom’s clip-ons and studied them to figure out a way to make a pair in wire.   And today I’m very pleased to announce the release of a new tutorial – Clip-on Earrings!

Clip-OnEarrings-Main

The Clip-on Earrings tutorial includes two variations:  Variation 1 makes a basic spiral, with a loop for adding a dangle.  Variation 2 forms a base on which you can add your own embellishment, so if you have a favourite bead, or button, you can add it.  Variation 2 also has a loop for adding a dangle.

13 pages, 45 photos and 40 steps
USD $8.00

Level of Difficulty:  Easy

Tools and Materials You’ll need:

Tools:
3-Step Pliers
Flat Nose Pliers
Round Nose Pliers
Flush Cutting Wire Nippers
Permanent Marker
Measuring Tape/Ruler
Jeweller’s File
Rouge Cloth
10 mm Dowel/Knitting Needle (for Variation 2)

Materials:
15″ (38 cm) 20 ga. Hard Round Sterling Silver wire

Substitutions:
20 ga Half Hard Silver wire can be substituted.

Available from my tutorials page and my Etsy Shop.

Tutorial – Art Nouveau Bangle

I’m pleased to announce that my newest tutorial, Art Nouveau Bangle, is now available!

This bangle features lovely flowing curves and Celtic elements that were common in the Art Nouveau period.

The project was a big hit with my students at the Haliburton School of the Arts! Once you have the basic technique down, you can easily adapt the design and let your creativity flow to create your own variations!

16 pages, 103 photos, 110 steps, plus design notes
USD $15.00

Level of Difficulty: Advanced

Tools and Materials you’ll need:

Tools:
Flat Nose Pliers
Round Nose Pliers
Flush Cutting Wire Nippers
Permanent Marker
Measuring Tape/Ruler
Bracelet Mandrel
Penknife
1/4″ dia. Masking Tape
Rouge Cloth

Materials:
96″ (240 cm) 20 ga Soft Square Silver wire
69″ (175 cm) 22 ga Half Round Silver wire
22 x 30 mm cabochon

Substitutions:
22 ga Soft Square Silver wire can be substituted for the 20 ga. wire.

Available from my tutorials page and my Etsy Shop.

Interview with Lisa Holley, Bejewelled Jewelry

Lisa Holley is a member of the Starving Jewelry Artists Etsy Street Team.  The Dora, Alabama resident is helping to promote the team by featuring other members on her webjam site.

This week, it’s my turn.

Thanks Lisa!

Interview with Jewelry Report – Part 1

I was recently contacted by Angela Neal of Jewelry Report, asking to interview me for an article.  I’m happy and grateful for the opportunity!

Part 1 of the article was posted today, and deals with selling jewelry tutorials online.

Part 2 will be published on Thursday, and I’ll post the link then.


About Jewelry Report (from the website)
The Jewelry Report is intended to be a place to find news, reviews, tools & tips, and more miscellaneous information from the jewelry making and design world, featuring articles by jewelry enthusiasts and experts.
News Science brings us new materials and designers create innovative techniques every day.  We look at hot new trends in jewelry making, along with what’s hot in jewelry fashion, and other news from the jewelry industry.  Read about how cutting edge designers are taking jewelry to new levels and discover what trends that could lead the way for the jewelry of tomorrow. Reviews There are literally thousands of jewelry related web pages on the net.  We try to bring you the best.  Our writers give their opinion on some of the best supplier sites, jewelry blogs and how-to educational sites,  as well as reviewing new jewelry making books and materials. Tools & Tips In this section our contributors share their own experiences and present some solutions to common jewelry making problems as well as offer up a few clever shortcuts to save you time and hassle. More Miscellaneous Information We bring you a random assortment of articles such as ‘Why jewelry making and cats don’t mix’, ‘How to find your signature jewelry style’, ‘The problems and pitfalls of pricing your work’ and many more jewelry related topics, all served up with a dash of humor and the wry wisdom that comes from getting it right only after getting it wrong. Happy reading and beading!

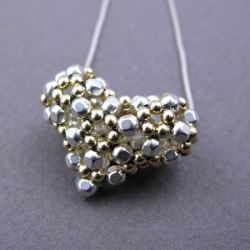
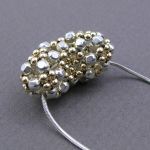
YOJ09-15 Beaded Puff Heart Pendant

Beaded Puff Heart Pendant (2009)
Sterling silver & gold-filled beads, fishline
L 2.8 cm x W 2.5 cm x D 1.0 cm
Beaded, right angle weave

This week’s project is part one of a larger piece I’m working on for an HSTA faculty exhibition to be held at the Rails End Gallery in July.

This is the first time I’ve ever tried my hand at straight beading, and I have to say that I’ve developed a very healthy respect for the people who do this type of work.  This heart was created using a pattern by “Laura” published on the 3DBeading.com site.  I initially had the foolish idea to try it using wire, but gave up after about 5 steps.  Fishline is definitely the way to go. I would love to repeat this pattern using rubies, but there’s no way to thread the fishline into the itty-bitty holes the multiple times the pattern requires.

It turned out a little bigger than I originally wanted, but the impact on the overall design will be minimal, and may actually make the final piece more interesting.

More photos:

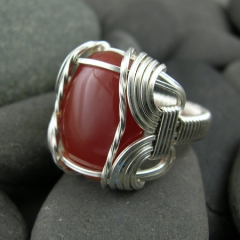
YOJ09-02 Standard Form Ring

Standard Form Ring (2009)
Sterling silver, carnelian
Size 10

I wasn’t intending to post this as my second entry for the YOJ, but it’s now Sunday, the due date for this week, and the piece I actually wanted to post isn’t finished.  I’m “tweaking”.  It feels very much like I’m doing a science experiment.

So… in the meantime…

I’m going to be teaching at Haliburton again this summer, and I have a bunch of tutorials I need to write in preparation for the class.  Last fall I proposed a second level wire jewelry course, which was accepted.  One of the projects is going to be the Standard Form Ring, aka Pharaoh’s Ring.  (Why it’s called the “Pharaoh’s Ring” is a mystery:  I haven’t been able to find any historical examples using wire.  References to cast versions, yes, wire, no…).  It’s called the “Standard Form Ring” because it’s one of the all-time classic wireworking ring patterns.  A version of this ring was published in Moods in Wire by Ellsworth Sinclair, Beginning Wirecraft by Jessie Donnan, and in the Wire Artist Jeweller Magazine (June 2003).  It’s a substantial ring, usually worn by men.  I started writing my version this week, in between printing off “printing sheets” for Number 2 Son, who likes to do “homework”.

(Edit Jun. 25/09:  Thanks to some excellent detective work by Helen Goga, a historical reference for the Standard Form Ring has been found!  Mr. Thomas Vincent Phelan received a patent for the ring design (US Des. 150,726) in August 1948.  The patent lasted for 14 years, and the design went into the public domain in 1962.)

My own personal artistic proclivities don’t lean towards classical wirework, so I haven’t made this type of ring before.  I followed the WAJ instructions for my first two attempts.  I often tell my students that they shouldn’t worry about what their first attempt looks like:  usually with the first one, you’re just trying to get your head around the steps, so clumsiness is part of the process.  It’s no different for me.  This ring was attempt number 3… and I’ll likely make at least two more in the process of refining, writing and photographing the steps for the instructions.

There are useful wireworking skills to be learned from doing this project.  There are definitely some “tricks” to getting it to look nice.  Notes are being scribbled…

Some other views:

Tutorial – Double Celtic Cross & Scrolls Earrings

.

.

.

.

.

.

.

.

.

At long last, a new tutorial!

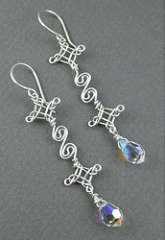
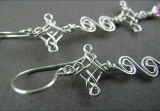
Double Celtic Cross & Scrolls Earrings

I created this design back in 1998, and it’s always been very near and dear to my heart!  For those of you who love all things Celtic, these earrings combine a couple of classic Celtic elements:  crosses and scrolls!

14 pages, 63 photos, 45 steps, plus design notes

USD $10.00

Available now from my Tutorials Page.

Tutorial – QEW Earrings

QEW EarringsQEW Earrings
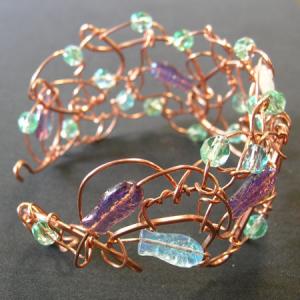
Inspiration comes from the strangest places! This modern-looking pair of earrings was inspired by an Art Deco-era light standard I spied while driving along the Queen Elizabeth Way, in Toronto – and hence the name, QEW! I can’t remember exactly where it was – somewhere between High Park and the Humber Hump – only a quick glimpse, but it was enough!

9 pages, 26 photos, 22 steps, plus design notes

FREE

Available now from my Tutorials Page.

(Let me know what you think of the new tutorials format.)

Happy New Year!