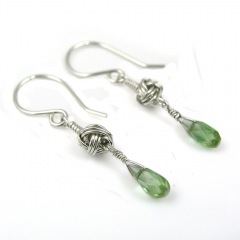
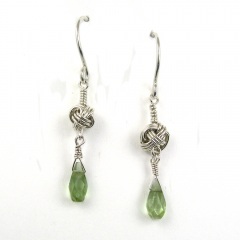
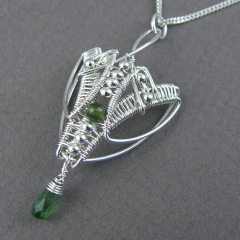
YOJ10-15 Knotted Earrings 3

Knotted Earrings 3 (2010)
Sterling silver, fine silver, tourmaline
Constructed, cold-joined
L 3.7 cm x W 0.5 cm (W 1.45″ x L 0.2″)

Continuing on from last week, since I made several of the Monkey’s Fist knots, I made another pair of earrings!

I’ve been doing some experimenting with photography lately, putting my pieces on a white background instead of the medium gray.  I’m looking for ways to make the images “pop” more – in my recent work I’ve been using a lot of stones that have the same value as the background, and it makes the jewellery look dull.  “Value” in colour terms refers to how light or dark it is.  (To see check the value of your stone, stare at the photo with squinted eyes – if the stone disappears it has the same value as the background.)  In order for a photo to have visual interest, it has to be either lighter or darker than the background, otherwise the eyes see what’s there, but the brain registers “ho hum”.

It’s a bit more work to deal with a white background – inevitably, and even though I have a white balance setting on my camera – the raw photo comes out slightly grey.  Photoshop can adjust the balance it easily, but then I usually still have to do some extra clean up.  It’s a bit tricky to lighten the background enough to get rid of “noise” but not so much that the jewellery bleaches out.

From a print perspective, (putting on my editor hat for a moment), getting photos with white background is a godsend for layout.  I can plunk them down anywhere on a page and build text around them.  Or I can crop and put several images close together – something that isn’t possible when the jewellery is shot on a grey or staged background.   There are no distractions – you look at the jewellery and nothing else.

While they work for print and web, white backgrounds do *not* work well for jury photos.  I had the opportunity to sit in on a jury for a show recently (something I highly recommend BTW, it’s very educational), and I noticed that the photos with white backgrounds were always very jarring.  Backgrounds with a value of medium to dark (but not black) and *absolutely no props* worked best for jury photos.  Prop shots work well for Etsy, but are distracting in jury.

More photos:

YOJ10-03 Marquise Series: Pendant 8

Marquise Series:  Pendant 8 (2010)
Sterling silver, fine silver, tourmaline
Constructed, cold-joined, woven
L 5.0 cm x W 2.25 cm x D 1.0 cm
(Update: SOLD June 2013)

One of my new year’s resolutions was to start using a Job Jar.  My family and friends, who know me very well, know that I’m hopeless about housework.  I think it was Erma Bombeck who said “Nature can’t abhor a vacuum as much as I do.”  That kind of sums up my attitude nicely.

However, I do live with three other (messy) people, so some token effort to maintain order must be made.  So… enter the Job Jar.  I wrote all the various chores on the little slips of paper, and included some fun things, and every day I pick one out of the jar.  The choice is completely random, although I like to think of it as leaving it up to God/the Universe to pick the task that is right for me on any particular day.  Some days I have more energy than others, and interestingly enough, each task so far has been perfect for the day it was chosen.  I do my Job Jar job early in the day, and then the rest of the day is mine to do as I please.

The net result of doing my housework this way is that I’m being much more productive with my jewellery making as well.  So, I feel good because my house is slowly getting cleaner, and I’m getting to work guilt-free on something I love every day.  Bonus!

The studio gremlins paid a me a visit this week and stole this piece for a few hours.  I noticed it was missing after my husband had done a sweep through the house collecting detritus to put out in the garbage on Monday night.  He tends to be somewhat brisk and indiscriminate when he does this.  A frantic search turned up nothing, and I was resigned to it having disappeared into the mass of trash.  On Tuesday, my job from the Jar was “Clean the livingroom.”  It was like a bunch of angels were standing around saying “We want to help you”.  LOL

So, I set to work, cleaning, sweeping and reorganizing the room.  When I picked up and moved one of the toy boxes, lo and behold, there was the pendant!  With a quick prayer of thanks, I put it in a safe location, where I knew I’d find it again.

Like the previous pieces in the series, the pendant is formed using a marquise shape.  When I was first shaped the wire, I thought the pendant looked like a moth.  The form evoked a very strong Art Nouveau influence.  As I added the weaving and the beads, the moth form persisted, and I noticed that the pendant was starting to look like Rainbow Wrapping.

Originally, I was going to hang the pendant the other way around, from the point.  It reminded me of the Star Trek logo.  I didn’t like how the tourmaline drop looked hanging from the long tail though – it threw off the balance.  So the drop was moved to the point, and the tail became the hanging point.

While photographing the piece today, I started seeing the form of an elephant face.   How cool!  I don’t remember ever seeing so many different influences in one piece.

What do you see?  Let me know!

More photos:

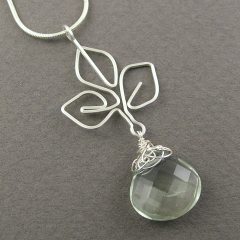
YOJ09-36 Green Sprout Pendant

Green Sprout Pendant (2009)
Constructed
Sterling silver, fine silver, prasiolite (green amethyst)
L 4.6 cm x W 2.2 cm

This week, I’ve been thinking alot about growing things, regeneration and rejuvenation.  Unfortunately, spring is a long way off, so I’m sort of out of sync with the cycle of life.  It’s the colour of prasiolite beads I bought in Bancroft (the only strand of beads I bought there).  It’s such a sweet, fresh green, and it reminds me of spring, seeds sprouting, life bursting forth anew.

So, I used the bead as a sort of seed, with “roots” growing around the peak, and a little plant “sprouting” out from the roots.

Prasiolite, commonly called “green amethyst” as a marketing ploy, does occur naturally, but is very rare.  Most prasiolite is created by heat treating amethyst or citrine.  Just to confuse things, there is another stone called praseolite, also green, which is created by heat treating iolite (cordierite).  This latter stone has a greasy luster, which may help in distinguishing the two.

My copy of Love is in the Earth by Melody (Sixth Printing 1993) doesn’t include an entry for either stone, but I found this entry just now on another website while writing this blog entry (added emphasis mine):

Prasiolite brings one appreciation, approval, and acclaim (and occasionally) fame. It further promotes the recognition of ones accomplishments and furthers the completion of same.

Prasiolite has been known as the “celestial root”, bringing the ancient knowledge of illumination, germination, and growth. …. Prasiolite further provides for sufficient tranquility of the minds to assist one in contemplating metaphors without vulnerability to the unknown.

Prasiolite has also been used to bring forth a polarizing prismatic energy, which engenders a spectrum of energy to clear and to activate all of the chakras……

Prasiloite has been used to stimulate healing on the spiritual level and to assist one in regaining the connection with the perfection of the self and the physical body….

Ha! How’s that for connecting with stone energy!?

More views:

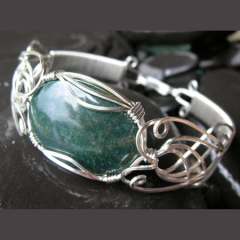
YOJ09-27 Art Nouveau Cab Bangle

Art Nouveau Cab Bangle (2009)
Sterling silver, bloodstone
L 21.5 cm x W 2.5 cm
Constructed, cold joined

Although it’s supposed to be a calming stone, I’ve always found bloodstone to have a kind of overpowering “in-your-face” energy that’s difficult to deal with.  For the last few weeks, though, I’ve been wearing it while working on my tutorials, and it’s been helpful for keeping my energy levels up and focused.  I love the red spotting on this cab, and the slight yellow cloud overlaying the green.  This was part of a group of cabs I bought when The Nautilus closed 10 years ago.  The Nautilus was *the* place in Toronto to buy rockhounding and lapidary supplies.  Located in the far, far east of the city, I remember it taking an obscenely long time to get there on city transit from where I lived in Little India.  But what a treasure trove!  The owner, Roy MacLeod, was a passionate rockhound and filled his store with all the bits and bobs needed to work with and admire rocks.  Sadly, Roy didn’t live to see the millennium, and the closing of his store left a void that still hasn’t been filled.

In designing the Level II course for Haliburton, I was thinking about what skills would be most useful for the students to learn.  In Level I, they learn the basics:  working with single wires, developing dexterity with tools, etc.  There are very few multi-wire projects.  In Level II all but two of the projects are multi-wire pieces, and the students have to deal with doing steps early on that don’t actually come into full use until much later in the construction. Wire control becomes very important.

One of the things Level II focuses on is settings:  half of the projects deal with some form of stone setting.

I think this is by far the most complex of the projects I’ll be teaching.  Hopefully by the time we get to this point in the course, the students will have enough confidence to tackle it.  If not, it’s easily adapted to something simpler.  I’ll let them decide how energetic they want to be.

This tutorial will be available for purchase and download off my website after I get back from Haliburton.  I’ll post the link when it’s up, along with more photos.

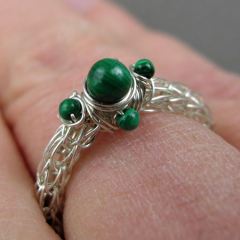
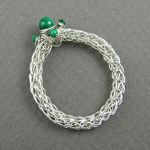
YOJ09-20 Viking Knit Ring

Viking Knit Ring (2009)
Fine silver, malachite, howlite
Nalbinding, single knit, constructed, cold joined

I finally got back to writing this week!  I have six tutorials to write in preparation for my class in Haliburton in July.  So far I have completed writing the draft on one of them.  Photos and actually putting the tutorials together are still outstanding.  I’m keenly aware of how quickly the time is going, so a few weeks ago I decided to put Tigger into daycare two days as week.  That is giving me several hours of uninterrupted work time, since it co-incides with the days that Thumper is in school.  What Heaven!

Usually I make the project, writing the steps as I go.  Then I put the text aside for a week or so, come back to it and reconstruct it following my instructions.  If I stumble on any part of it, that means a rewrite is in order.   Refining continues as I take the photos and do the layout.  Lots of work… which means I gotta start makin’ like a bread truck and haul buns…

This week, I was working on instructions for viking knitting.  I experimented with incorporating 2 and 4 mm beads, which led to a screw up – err… “Design Choice” – when I went to draw the chain.  I ended up having to take the chain apart, but salvaged enough to make this ring.  It’s been an interesting experiment in timing myself as well – construction of enough chain to make a bracelet is taking a little over 2 hours.  Adding the beads was just for my amusement, and won’t be part of the final instructions.

More photos:

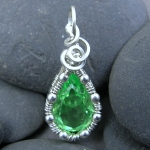
YOJ09-04 Swarovski Pendant

This has been a busy week.  I’ve been juggling a bunch of different projects, trying to wrap some up, get ahead on others.  I’ve made some progress in my quest to figure out how to incorporate felting for a bonsai.  Unfortunately, the avenue I’m following at the moment is very labour intensive.

Years ago, an acquaintance at the Gem & Mineral Club of Scarborough named Frank Hoffman commented that if you’re going to go to the effort of making a piece of jewellery, you should make it out of karat gold.  His reasoning was that for the same labour you would be able to charge a much higher price, because of the perceived value of the gold.  For this felted bonsai, I’m starting to think he made a good point.

Anyways… I made a pair of earrings this week, which are being given away as a birthday present, but I didn’t want to post those.  So… here it is, Sunday night, and I need to post something.

About a year ago, a lady on CWJ, Nancy Van Tassell, was selling off some Swarovski gems.  I bought a bunch.  They’ve been sitting in my stash ever since.  Recently, when I was cleaning up my bench, I discovered them again.  So… with the clock ticking down, I decided to try my hand at a pendant.  Since the gem has a deep back, I had to figure out how to set it without ending up with the point sticking out too much.  I also didn’t want the pendant to look really heavy.  So, the solution was to make an openworked bezel.  It turned out okay, but I think it would have looked better in a thinner gauge of wire.

My eyesight is going…  *gloom*… and I’m tired… and the pendant took forever to make… but hey, at least I got a piece done.